
I still remember the first time I baked crescent rolls from scratch. The smell alone filled the kitchen before they even came out of the oven. That moment hooked me. If you want soft, golden rolls with rich flavor and light layers, this recipe gives you exactly that. You get full control over the texture, the sweetness, and the finish, all in one simple process.
Table of Contents
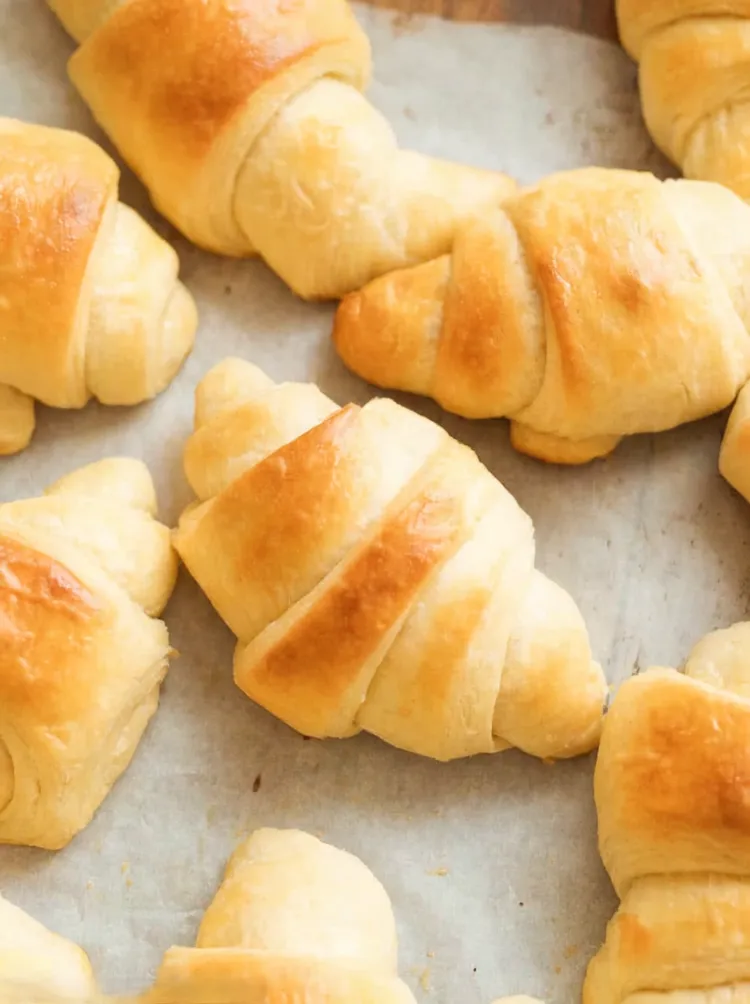
Crescent Rolls vs. Croissants
At first glance, crescent rolls and croissants look alike. They both have that curved shape. But the similarity stops there. Croissants use a long folding process with many layers of butter, which creates a very light and crisp texture.
Crescent rolls are much simpler. They need fewer steps and less time. The dough is softer and easier to handle, which makes them ideal for home baking.
The final result is also different. Crescent rolls have a soft, fluffy inside with a lightly crisp outer layer. They still taste rich and buttery, but without the complex process used for croissants.
Ingredients Needed
Here is everything you need to make soft and buttery crescent rolls at home. Each ingredient plays a clear role in texture and flavor.
For the Dough
- 1 tablespoon instant yeast
Helps the dough rise quickly and gives the rolls a light texture - ½ cup warm water at about 110°F or 45°C
Activates the yeast. The water should feel warm, not hot - ½ cup whole milk
Adds richness and keeps the rolls soft - ½ cup butter at room temperature
Gives a rich taste and tender crumb - ½ cup white sugar
Feeds the yeast and adds a mild sweetness - 1 teaspoon salt
Balances the flavor and strengthens the dough - 2 large eggs at room temperature
Help create a soft and fluffy texture - 4 cups all purpose flour
Forms the base of the dough and gives structure
For the Finish
- 3 tablespoons melted unsalted butter
Brushed on top for a golden color and extra flavor
Tip: If possible, weigh your flour instead of using cups. This helps you avoid adding too much, which can make the rolls dense.
How to Make Homemade Crescent Rolls
Follow these steps carefully for soft, fluffy rolls with a light golden finish. Take your time with each stage. Good dough leads to great results.
1. Activate the Yeast
Add warm water to your mixing bowl, then sprinkle in the yeast. Let it sit for about 5 minutes. You should see a light foam form on top. This shows the yeast is active and ready.
2. Warm the Milk Mixture
In a separate bowl, combine milk, butter, sugar, and salt. Heat gently until the butter melts. Stir well. Let the mixture cool until it feels warm, not hot. If it is too hot, it can damage the yeast.
3. Combine Wet Ingredients
Pour the warm milk mixture into the yeast mixture. Stir well. Add the eggs and whisk until smooth. The mixture should feel slightly warm to the touch.
4. Form the Dough
Add most of the flour slowly while mixing on low speed. If mixing by hand, use a spoon at first. Once the dough starts to come together, continue adding small amounts of flour until it becomes soft and slightly sticky.
5. Knead the Dough
Transfer the dough to a lightly floured surface. Knead for 6 to 8 minutes. The dough should become smooth and elastic. If you press it lightly, it should spring back.
6. First Rise
Place the dough in a greased bowl and turn it once to coat all sides. Cover with a clean towel. Let it rise in a warm spot for about 1½ to 2 hours, or until it doubles in size.
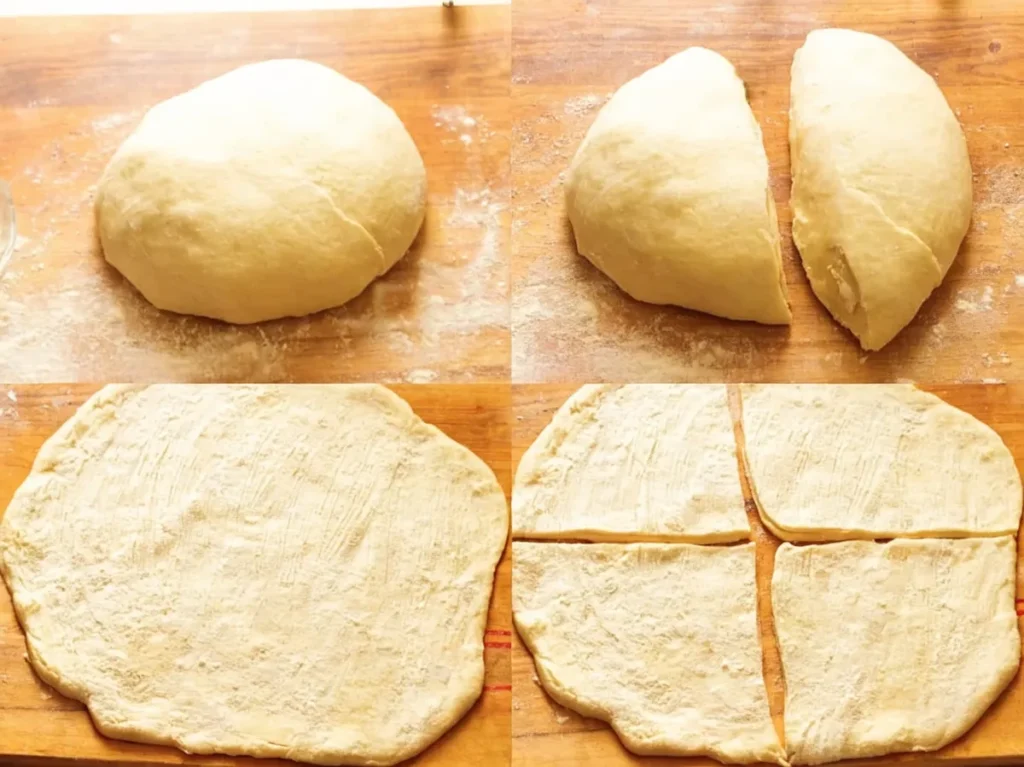
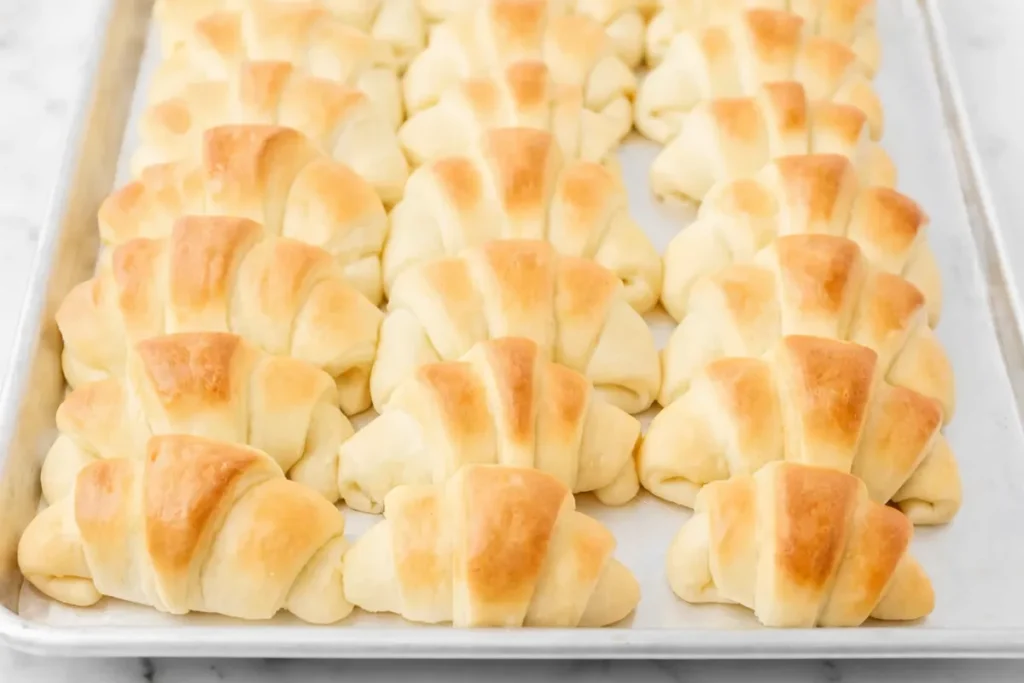
7. Shape the Crescents
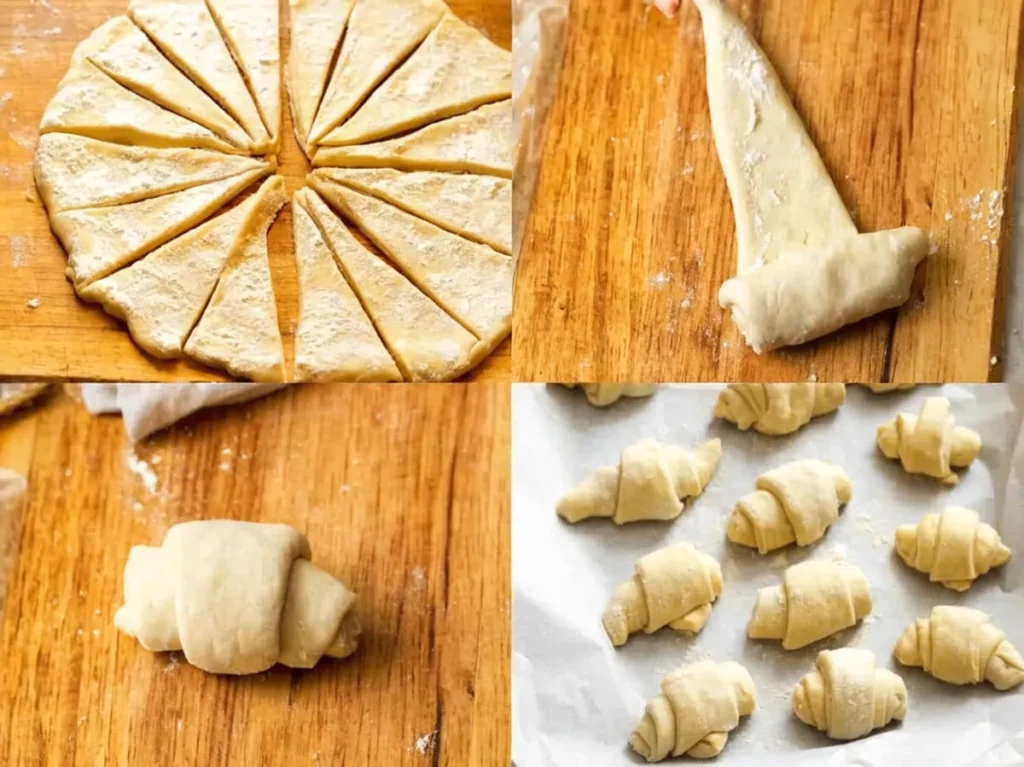
Press the dough down gently to release air. Divide it into two equal parts. Roll each part into a round about 12 inches wide. Cut each round into 16 triangle pieces.
Start from the wide end of each triangle and roll toward the tip. This creates the classic crescent shape.
8. Second Rise
Place the shaped rolls on a greased baking sheet, leaving space between each one. Cover lightly and let them rise again for about 30 minutes. They should look puffy.
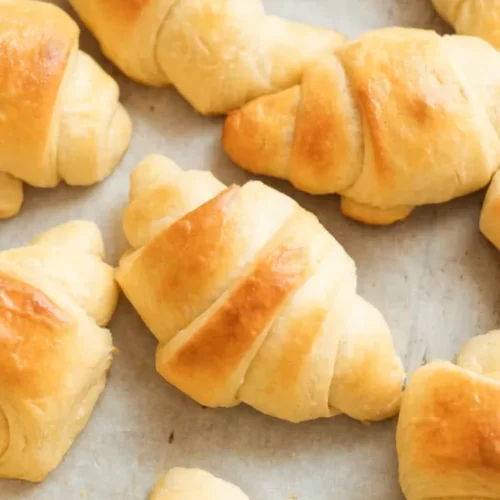
9. Bake
Heat your oven to 400°F. Brush each roll with melted butter. Bake for 12 to 14 minutes until the tops turn golden brown.
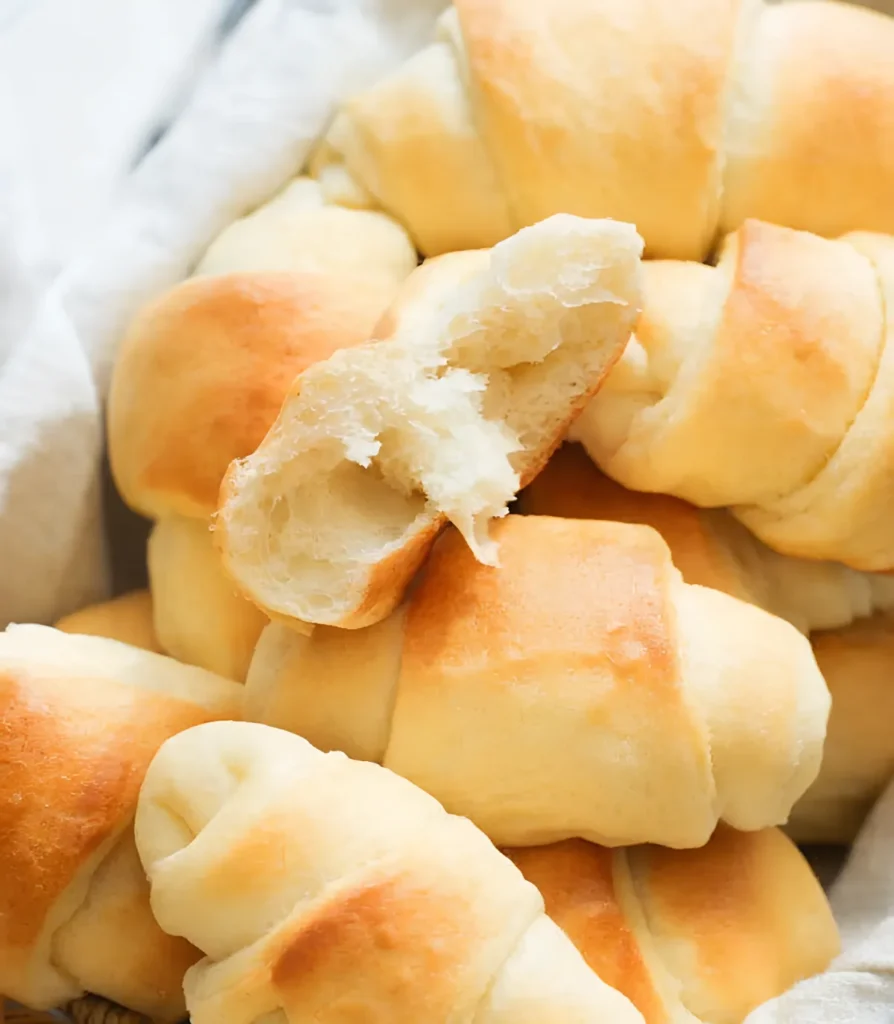
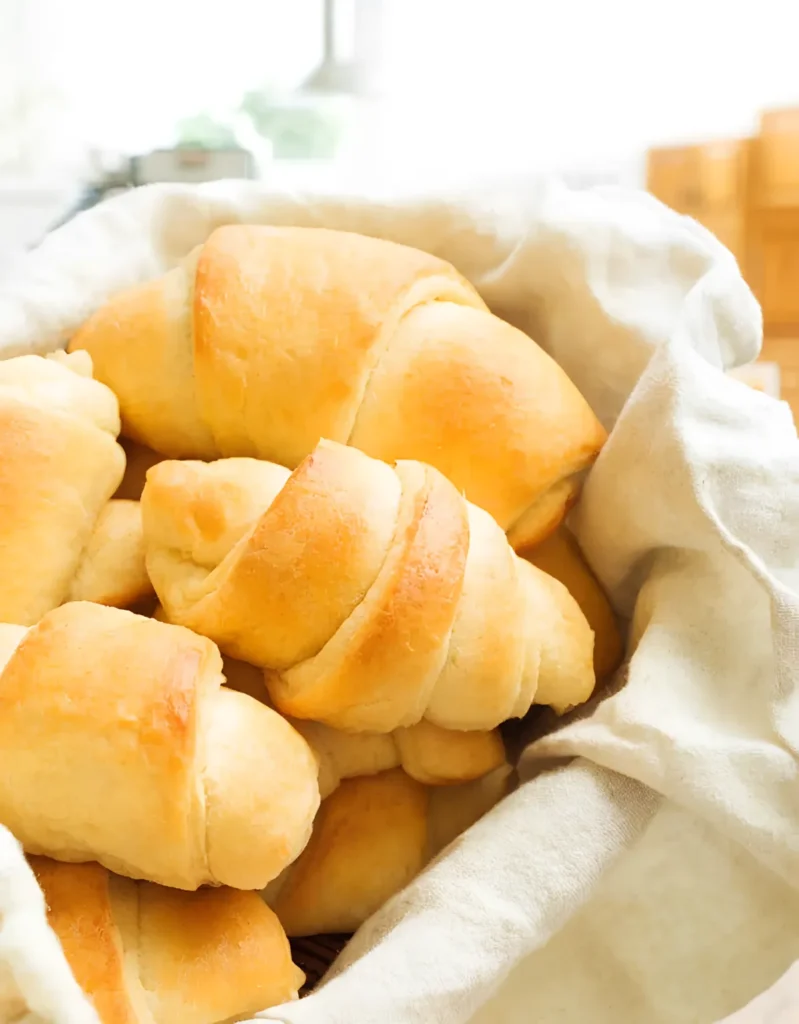
10. Serve
Remove from the oven and let them cool slightly. Serve warm with extra butter if you like.
Expert Tips for the Best Results
Small details can change the final texture of your crescent rolls. These tips help you get soft layers and a rich, buttery finish every time.
Add Layers for a Flaky Texture
If you want more visible layers, try a simple folding method. Roll the dough out, brush it lightly with melted butter, then fold it over itself. Repeat this process three to four times before shaping. This creates thin layers that bake into a light, delicate texture.
Do Not Overwork the Dough
Mix and knead just until the dough becomes smooth and elastic. Too much handling can make the rolls dense instead of soft. A gentle touch keeps the inside light and airy.
Use a Sharp Knife for Cutting
When you cut the dough into triangles, use a sharp knife or pizza cutter. A dull blade can drag and tear the dough, which affects how the rolls rise and bake.
Watch the Dough, Not the Clock
Rising time can change based on room temperature. Instead of focusing only on time, check the dough. It should double in size and feel soft and puffy when ready.
Bake Until Light Golden
Do not wait for a deep brown color. A light golden top means the inside stays soft while the outside gets a slight crisp edge.
Make-Ahead and Freezing Instructions
You can prepare crescent rolls in advance without losing texture or flavor. This makes them perfect for busy days or special meals.
Flash Freezing Method
Shape the rolls and place them on a baking sheet. Let them rise until slightly puffy. Then place the tray in the freezer for about 30 minutes. Once firm, transfer the rolls to a sealed freezer bag. This step keeps them from sticking together.
Freezer Storage
Store the frozen rolls in a zip bag or airtight container. They stay fresh for up to 3 months. Label the bag with the date so you can track freshness.
Baking from Frozen
Place the frozen rolls directly on a baking sheet. Bake in a preheated oven at 400°F for about 15 minutes. Add a few extra minutes if needed until they turn golden.
Refrigerating the Dough
If you prefer fresh baking the next day, store the prepared dough in a lightly oiled bag. Keep it in the fridge for up to 2 days. When ready to use, let it sit at room temperature until soft, then shape and bake.
Short-Term Storage
If the rolls are already baked, keep them in an airtight container at room temperature for 2 to 3 days. Warm them slightly before serving for the best taste.
Conclusion
Homemade crescent rolls give you something store bought versions cannot match. You get fresh flavor, soft texture, and full control over every step. The process is simple, and the result is worth it. Warm, buttery rolls with a light, fluffy center can turn any meal into something special.
If you tried this recipe, share your results in the comments and leave a star rating. Your feedback helps others and keeps the recipe improving. You can also share your rolls on Pinterest or Facebook to inspire others.
What did you add to your crescent rolls? Did you try a sweet filling or keep them classic? Let me know below.
YOU MIGHT ALSO LIKE…
Crescent Rolls
Ingredients
Dough
- 1 tablespoon instant yeast
- ½ cup warm water about 45°C
- ½ cup whole milk
- ½ cup butter room temperature
- ½ cup white sugar
- 1 teaspoon salt
- 2 large eggs room temperature
- 4 cups all-purpose flour
Finish
- 3 tablespoons unsalted butter melted
Instructions
- Add warm water to a bowl and sprinkle yeast on top. Let sit for 5 minutes until foamy.
- Heat milk, butter, sugar, and salt until butter melts. Let cool until warm.
- Mix the milk mixture with the yeast mixture. Add eggs and whisk until smooth.
- Gradually add flour and mix until a soft, slightly sticky dough forms.
- Knead on a floured surface for 6–8 minutes until smooth and elastic.
- Place dough in a greased bowl, cover, and let rise for 1½ to 2 hours until doubled.
- Divide dough into two portions, roll into circles, and cut into triangles. Roll each triangle into crescent shapes.
- Place rolls on a baking sheet, cover, and let rise for 30 minutes until puffy.
- Brush with melted butter and bake at 200°C for 12–14 minutes until golden.
- Cool slightly and serve warm.
Notes
Nutrition Facts (Per Serving)
- Serving Size: 2 rolls
- Calories: 332 kcal (17%)
- Carbohydrates: 53g (18%)
- Protein: 8g (16%)
- Fat: 10g (15%)
- Saturated Fat: 6g (38%)
- Polyunsaturated Fat: 1g
- Monounsaturated Fat: 2g
- Trans Fat: 0.3g
- Cholesterol: 43mg (14%)
- Sodium: 180mg (8%)
- Potassium: 93mg (3%)
- Fiber: 2g (8%)
- Sugar: 8g (9%)
- Vitamin A: 297 IU (6%)
- Vitamin C: 0.003mg
- Calcium: 24mg (2%)
- Iron: 3mg (17%)
FAQs
What’s the difference between crescent rolls and croissants?
Crescent rolls are soft and slightly fluffy with a simple dough. Croissants use a layered dough with many folds of butter, which creates a lighter and crisp texture. Crescent rolls are faster and easier to make at home.
What are the ingredients in crescent rolls?
Crescent rolls use basic baking ingredients. These include yeast, warm water, milk, butter, sugar, salt, eggs, and flour. A final brush of melted butter adds extra flavor and a golden finish.
What is the secret to good rolls?
The key is proper dough handling. Use warm liquid to activate the yeast, knead just enough to build structure, and allow enough time for the dough to rise. Avoid adding too much flour, as this can make the rolls dense.
Are crescent rolls just puff pastry?
No, they are different. Puff pastry has many thin layers created by folding butter into the dough multiple times. Crescent rolls use a yeast dough, which gives them a soft and airy texture instead of a crisp one.
At what temperature do you bake crescent rolls?
Bake crescent rolls at 400°F. This temperature helps them rise quickly and develop a light golden surface while keeping the inside soft.
What can be made out of crescent rolls?
Crescent rolls are very flexible. You can fill them with cheese, meats, or vegetables for savory options. For sweet versions, try chocolate, fruit, or cream cheese. They also work well as a base for quick breakfast or snack ideas.