
Classic fudge recipe guides often feel tricky. Many methods ask for a candy thermometer, exact temperatures, and careful timing. A small mistake can leave the texture grainy or too soft. I learned this the hard way after several failed batches that never set right.
This Craft Dishes method keeps things simple. It uses only three ingredients and takes about five minutes of active prep. The result is rich, creamy homemade fudge that tastes like it came from a small fudge shop.
It works well for holiday gifts, bake sales, or a quick chocolate treat on a quiet evening.
Table of Contents
Why You’ll Love This Fudge Recipe
• Quick and simple
This easy chocolate fudge comes together in minutes. You melt the ingredients, pour the mixture into a pan, and let it set. No candy thermometer and no tricky timing.
• Only three basic ingredients
The recipe uses chocolate chips, sweetened condensed milk, and a small amount of butter. Most home kitchens already have these items.
• Rich and creamy texture
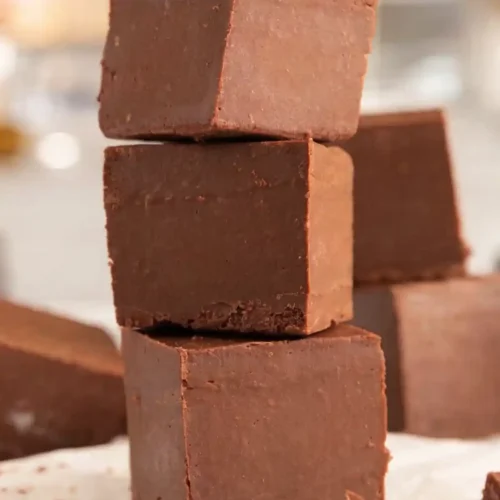
Slow heat and steady stirring create a smooth, thick mixture that sets into soft, creamy squares.
• Great for many occasions
Serve it at holiday parties, school bake sales, or family gatherings. It also works well as a homemade gift.
• A real crowd favorite
Chocolate lovers enjoy the deep flavor and soft bite. Guests often ask for the recipe after the first taste.
Ingredients Needed
A great fudge recipe starts with simple ingredients. Each one plays an important role in creating a rich, creamy texture.
For the Chocolate Fudge Base
• 4 cups chocolate chips (about 720 g)
Use good quality chocolate chips for the best flavor. Dark or semi sweet chips work well and give the fudge a deep chocolate taste.
• 2 cans sweetened condensed milk (14 ounces each, about 396 g per can)
This thick, sweet milk helps the fudge set without a candy thermometer. It also gives the mixture its smooth, creamy body.
• 1 teaspoon butter, softened
Rub the butter on the lining of the pan. This small step helps prevent sticking and makes it easier to lift the fudge out after it sets.
How to Make Fudge
- Prepare the baking dish
Line an 8 × 8 inch square baking dish with parchment paper or aluminum foil. Cover both the bottom and the sides. Leave extra paper hanging over the edges so you can lift the fudge out later. Rub the softened butter over the paper. This small step helps stop the fudge from sticking when it sets. - Combine the ingredients
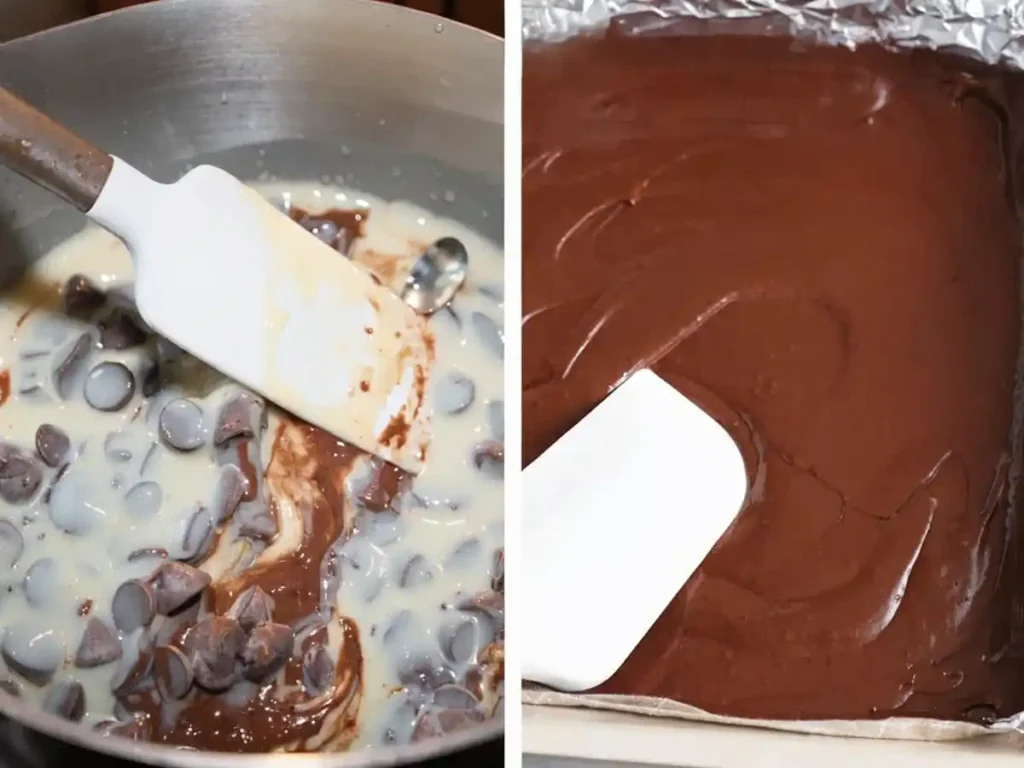
Place the chocolate chips and sweetened condensed milk in a medium saucepan. Pick a pan with a thick bottom if possible. A heavier pan spreads heat more evenly and lowers the chance of burning the chocolate. - Melt the mixture slowly
Set the saucepan over very low heat. Stir the mixture constantly with a spatula or wooden spoon. Keep stirring so the chocolate melts evenly and does not stick to the pan. After about five minutes, the mixture should look smooth, thick, and glossy. - Transfer to the prepared pan
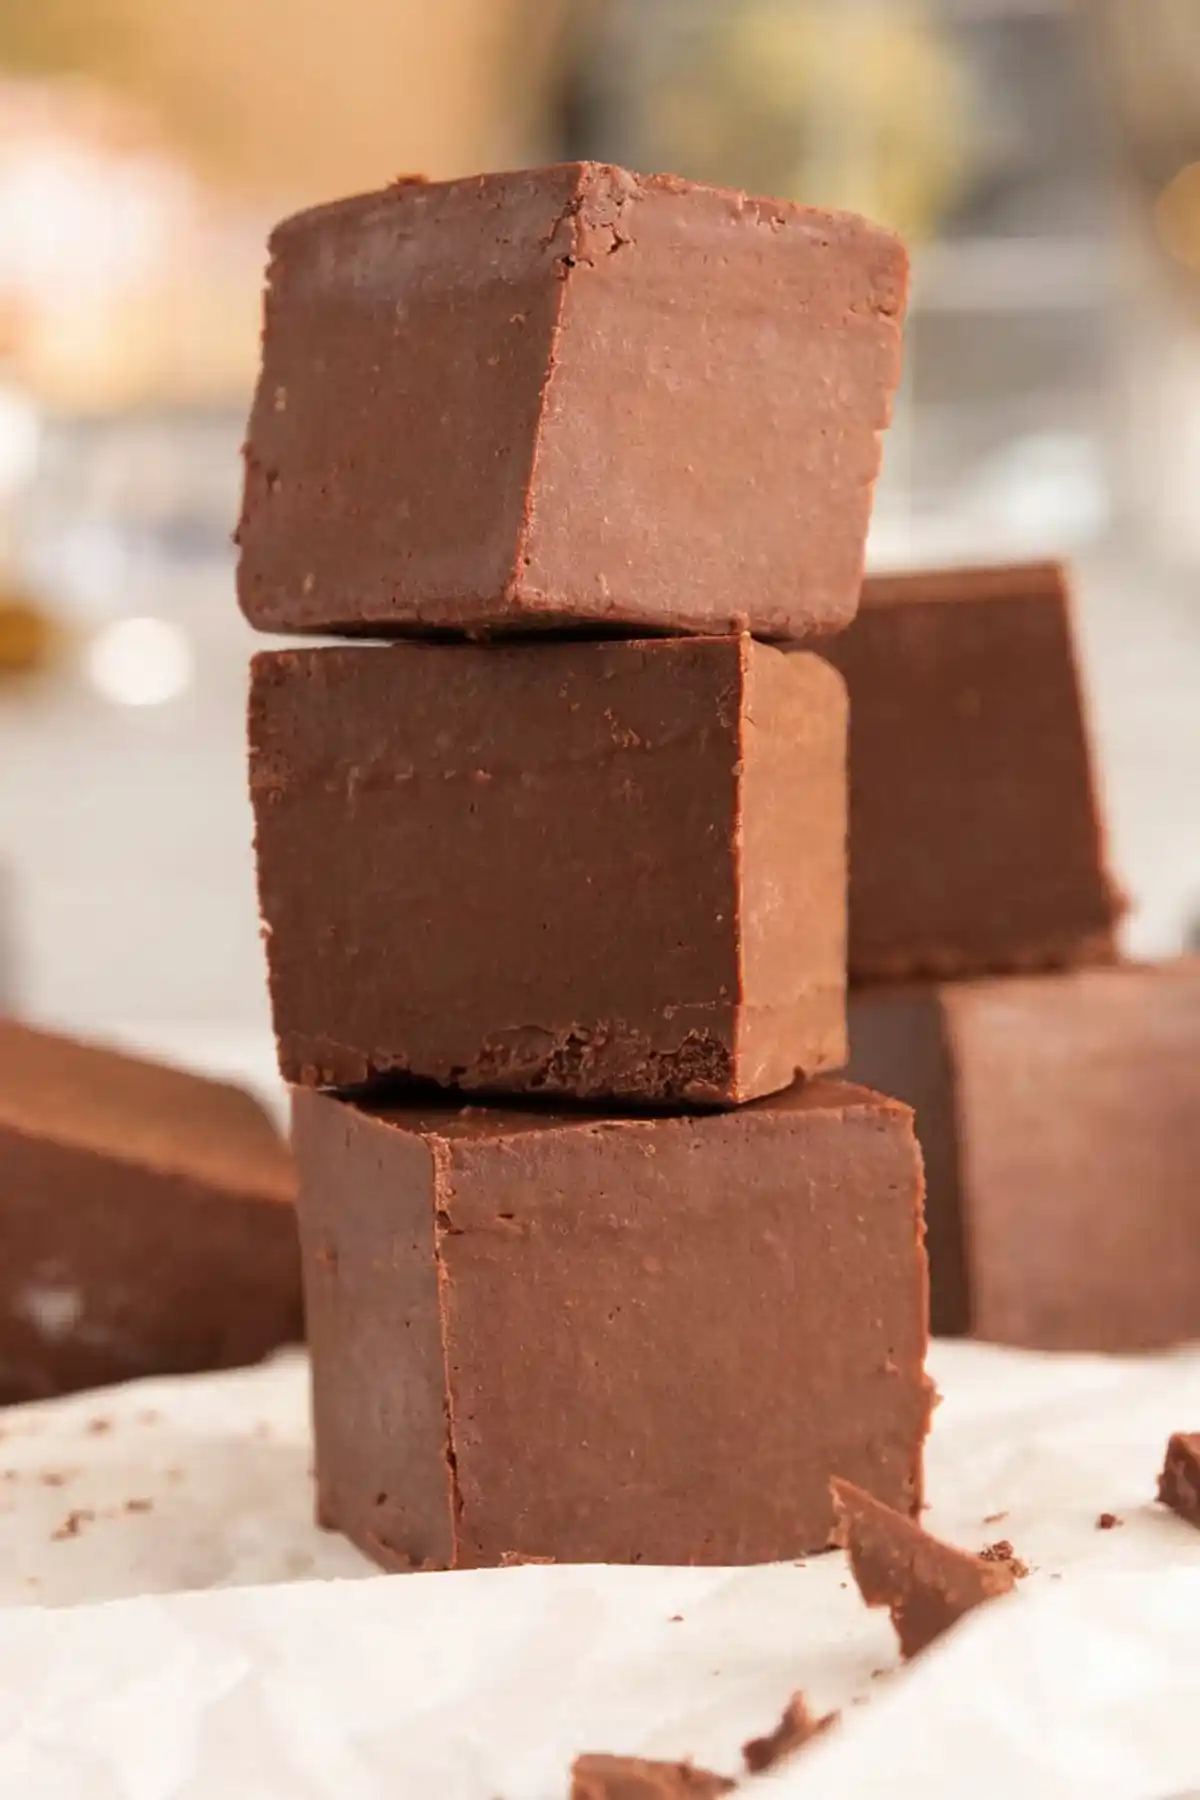
Once the chocolate is fully melted, pour the mixture into the lined baking dish. Use a spatula or the back of a spoon to spread it into an even layer. Smooth the top so the fudge sets neatly. - Let the fudge set
Allow the fudge to cool at room temperature for about three hours until it becomes firm. If you want it ready sooner, place the dish in the fridge for about two hours. - Remove and slice
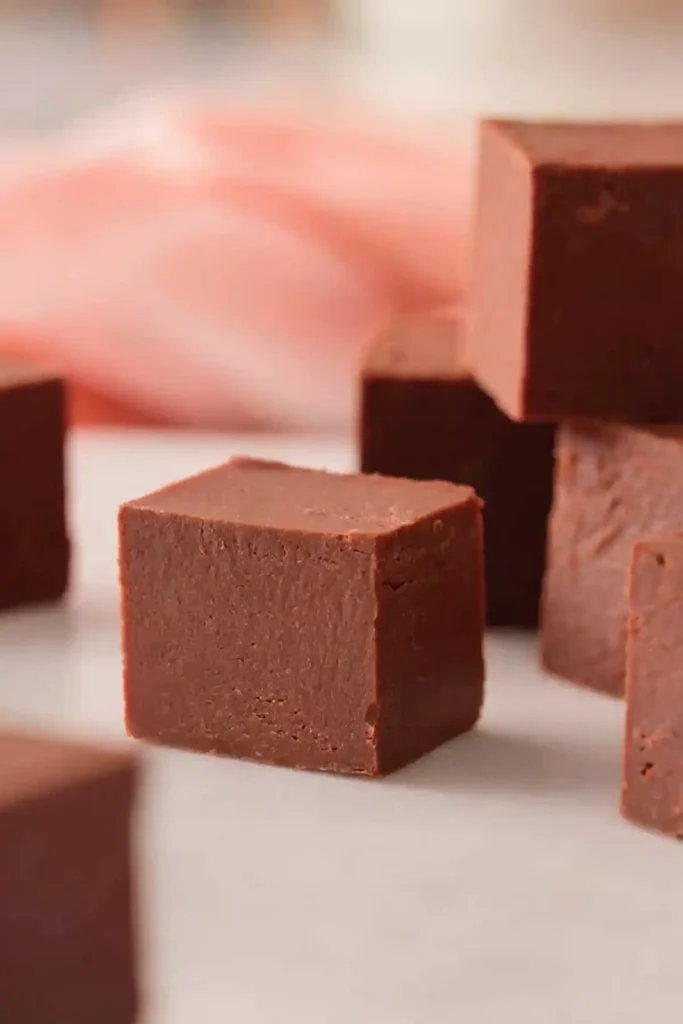
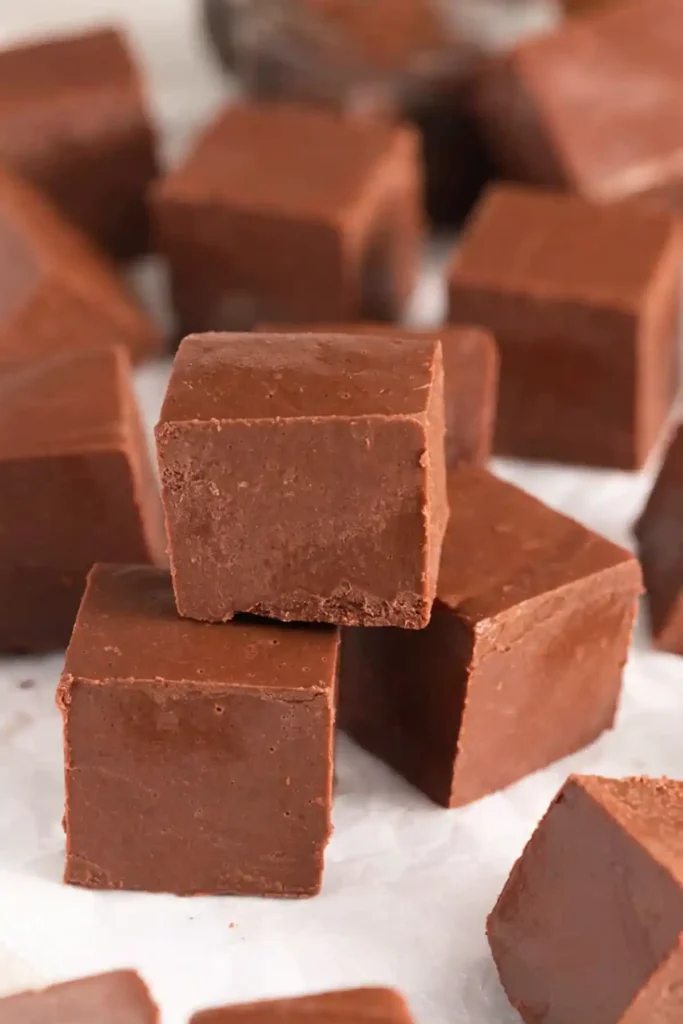
Lift the fudge out of the dish using the extra parchment or foil as handles. Peel away the paper and place the slab on a cutting board. Use a sharp knife to cut it into even squares. For cleaner cuts, warm the knife under hot water and dry it before slicing. - Serve or store
Enjoy the fudge right away, or wrap the squares in parchment or wax paper. Store them in an airtight container where they will stay fresh for up to two weeks.
Common Fudge Fails Fixed
Even a simple fudge recipe can run into small problems. The good news is that most issues are easy to fix once you know the cause.
Why is my fudge grainy?
Grainy fudge often happens when chocolate gets too hot. High heat can change the texture and cause sugar crystals to form. Another common cause is water getting into the chocolate mixture. Even a few drops can make the chocolate seize. Always melt the mixture over very low heat and stir often for a smooth result.
Why is my fudge too soft?
Soft fudge usually means it has not set long enough. The mixture needs time to cool and firm up. Let it rest at room temperature for several hours. If it still feels soft, leave it overnight. Cooler room conditions can also help the fudge set properly.
Can I use the microwave?
Yes, the microwave works well for this recipe. Place the chocolate chips and condensed milk in a microwave safe bowl. Heat for 30 seconds, then stir. Repeat in short bursts, stirring each time, until the mixture looks smooth and glossy. Stop heating once most of the chocolate melts and finish mixing by hand. This helps prevent overheating.
Storage, Freezing, and Gifting
Room Temperature
Store the fudge pieces in an airtight container. Keep the container in a cool, dry place. The fudge will stay fresh for about one week. Separate layers with parchment paper so the squares do not stick together.
Refrigerator
For a longer shelf life, store the fudge in the fridge. Wrap the pieces tightly or keep them in a sealed container to stop them from drying out. Properly stored fudge can last up to two weeks.
Freezer
Fudge freezes very well. Wrap each portion in plastic wrap, then add a layer of foil for extra protection. Place the wrapped pieces in a freezer safe container or bag. The fudge can stay frozen for up to six months. To serve, move it to the fridge and let it thaw for about three hours.
Gifting Idea
Cut the fudge into small slabs or neat squares. Wrap each piece in parchment or wax paper. Place them in clear cellophane bags and tie with a festive ribbon. This simple presentation turns homemade fudge into a thoughtful edible gift for holidays or special occasions.
Conclusion
This fudge recipe proves that rich homemade chocolate treats do not need complex steps. With only three ingredients and a few minutes of prep, you can make smooth, creamy fudge that tastes like it came from a candy shop. The method is simple, the texture is rich, and the results are reliable even for beginners.
It works well for holiday gifts, bake sales, or a quick dessert to share with family and friends. You can also add nuts, crushed candy, or flavored extracts to create your own twist.
If you tried this recipe, please leave a comment and a star rating below. Your feedback helps other readers and supports the Craft Dishes community. Feel free to share your fudge photos on Pinterest or Facebook.
What mix ins did you try with your batch? Tell us in the comments.
YOU MIGHT ALSO LIKE…
- Chocolate Chip Cookies
- Chocolate Mug Cake
- Chocolate Covered Strawberries
- No-Bake Cheesecake
- Chocolate Cake
Chocolate Fudge
Ingredients
Chocolate Fudge Base
- 4 cups chocolate chips dark or semi-sweet for deeper flavor
- 2 cans sweetened condensed milk 14 oz per can
- 1 teaspoon butter softened, used to grease parchment paper
Instructions
- Line an 8 × 8 inch square baking dish with parchment paper or aluminum foil, covering the bottom and sides. Leave extra paper over the edges to help lift the fudge later. Rub the softened butter over the paper to prevent sticking.
- Add the chocolate chips and sweetened condensed milk to a medium saucepan with a thick bottom for even heat distribution.
- Place the saucepan over very low heat. Stir constantly with a spatula or wooden spoon until the chocolate melts slowly and the mixture becomes smooth, thick, and glossy. This usually takes about 5 minutes.
- Pour the melted chocolate mixture into the prepared baking dish. Use a spatula or spoon to spread it evenly and smooth the top.
- Allow the fudge to cool and set at room temperature for about 3 hours until firm. For faster setting, refrigerate for about 2 hours.
- Lift the fudge out of the pan using the parchment paper edges. Place it on a cutting board, peel away the paper, and cut into even squares using a sharp knife. For cleaner cuts, warm the knife under hot water and dry it before slicing.
- Serve immediately or store the fudge pieces in an airtight container for later enjoyment.
Notes
Nutrition Facts (Per Serving)
| Nutrient | Amount |
| Calories | 198 kcal |
| Carbohydrates | 24 g |
| Protein | 3 g |
| Fat | 10 g |
| Saturated Fat | 6 g |
| Cholesterol | 9 mg |
| Sodium | 100 mg |
| Potassium | 208 mg |
| Fiber | 2 g |
| Sugar | 21 g |
| Vitamin A | 75 IU |
| Vitamin C | 0.6 mg |
| Calcium | 79 mg |
| Iron | 1.4 mg |
FAQs
What exactly is fudge?
Fudge is a soft chocolate candy made from sugar, milk, and butter. In many home recipes, chocolate and sweetened condensed milk replace the traditional sugar syrup method. The mixture melts together and then cools into thick, creamy squares with a smooth texture.
What is the secret to perfect fudge?
The key is gentle heat and constant stirring. Chocolate should melt slowly so the mixture stays smooth. A heavy saucepan helps spread heat evenly. Stir the mixture until it looks glossy and thick before pouring it into the pan to set.
Do condensed milk and chocolate make fudge?
Yes. Chocolate and sweetened condensed milk form a simple base that sets into fudge as it cools. The condensed milk provides sweetness and structure, while the melted chocolate creates the rich flavor and creamy texture.
Is evaporated milk or condensed milk better for fudge?
Sweetened condensed milk works best for this shortcut method. It already contains sugar and has a thick texture that helps the fudge set. Evaporated milk is thinner and usually needs extra sugar and careful cooking to reach the right consistency.
What are the common mistakes when making fudge?
Using high heat is a frequent mistake. Chocolate can burn or turn grainy if heated too quickly. Water entering the mixture can also cause the chocolate to seize. Another issue is not allowing enough time for the fudge to cool and firm up before cutting.
Why is my fudge still soft?
Soft fudge usually means it has not had enough time to set. Let the pan rest at room temperature for several hours or place it in the refrigerator to speed up the process. If the kitchen is warm, extra cooling time may be needed before slicing.