
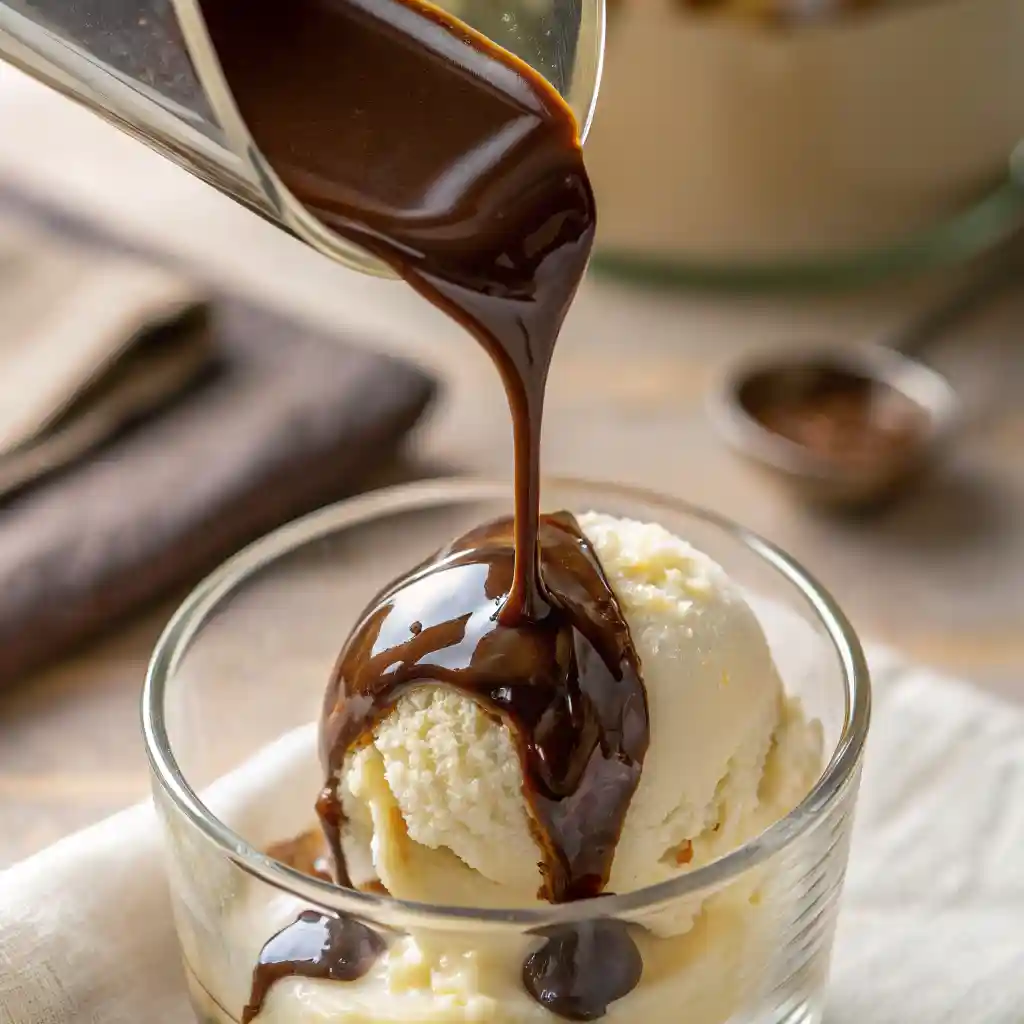
Have you ever craved that rich, velvety drizzle of chocolate that turns even the simplest dessert into something magical? This homemade chocolate syrup might just become your new kitchen obsession. Whether you’re pouring it over pancakes, swirling it into your morning coffee, or topping a scoop of vanilla ice cream, its deep cocoa flavor and smooth texture deliver pure chocolate bliss in every drop.
Forget store-bought bottles packed with preservatives—this easy chocolate syrup recipe is not only budget-friendly but also made with just a handful of pantry staples. It’s the kind of versatile dessert sauce that invites creativity while offering comfort in every spoonful. Ready to whip up a batch that’s better than anything on the shelf? Let’s make something irresistibly sweet, together.
Table of Contents
Key Benefits of Homemade Chocolate Syrup

If you’ve only ever reached for a store-bought bottle of chocolate syrup, you’re in for a delightful surprise! Making your own syrup at home comes packed with benefits that go beyond just flavor. Here’s why you’ll want to whip up a batch right away:
Pure, Rich Chocolate Flavor
Using unsweetened cocoa powder allows you to control the depth of the chocolate taste, delivering a smooth, velvety texture and a genuinely decadent experience that store-bought alternatives can’t match.
Simple, Wholesome Ingredients
Say goodbye to artificial preservatives and additives. Homemade chocolate syrup uses just a few pantry essentials like cocoa powder, sugar, water, and vanilla extract, making it a clean, healthier alternative for you and your family.
Versatile Dessert Sauce
Beyond ice cream sundaes, this chocolate syrup is incredibly versatile. Drizzle it over pancakes, waffles, cheesecakes, or even swirl it into your morning coffee or smoothie for a delicious twist.
Budget-Friendly Delight
Not only is homemade chocolate syrup fresher and more flavorful, but it’s also easier on your wallet. You’ll create larger batches for less money—making it a smart, economical kitchen staple.
Quick and Easy to Prepare
With just about 10 minutes of cooking, you’ll have a batch ready to store in your fridge. Plus, it stays fresh and delicious for weeks—perfect for quick treats or last-minute indulgences.
When you discover how easy and rewarding it is to make chocolate syrup at home, you’ll wonder why you ever settled for store-bought.
Ingredients You’ll Need
One of the best parts about this homemade chocolate syrup recipe is its simplicity—you probably already have everything in your kitchen. Each ingredient plays a role in building that luscious, deep cocoa flavor and silky texture we all love. Here’s what you’ll need:
Basic Ingredients
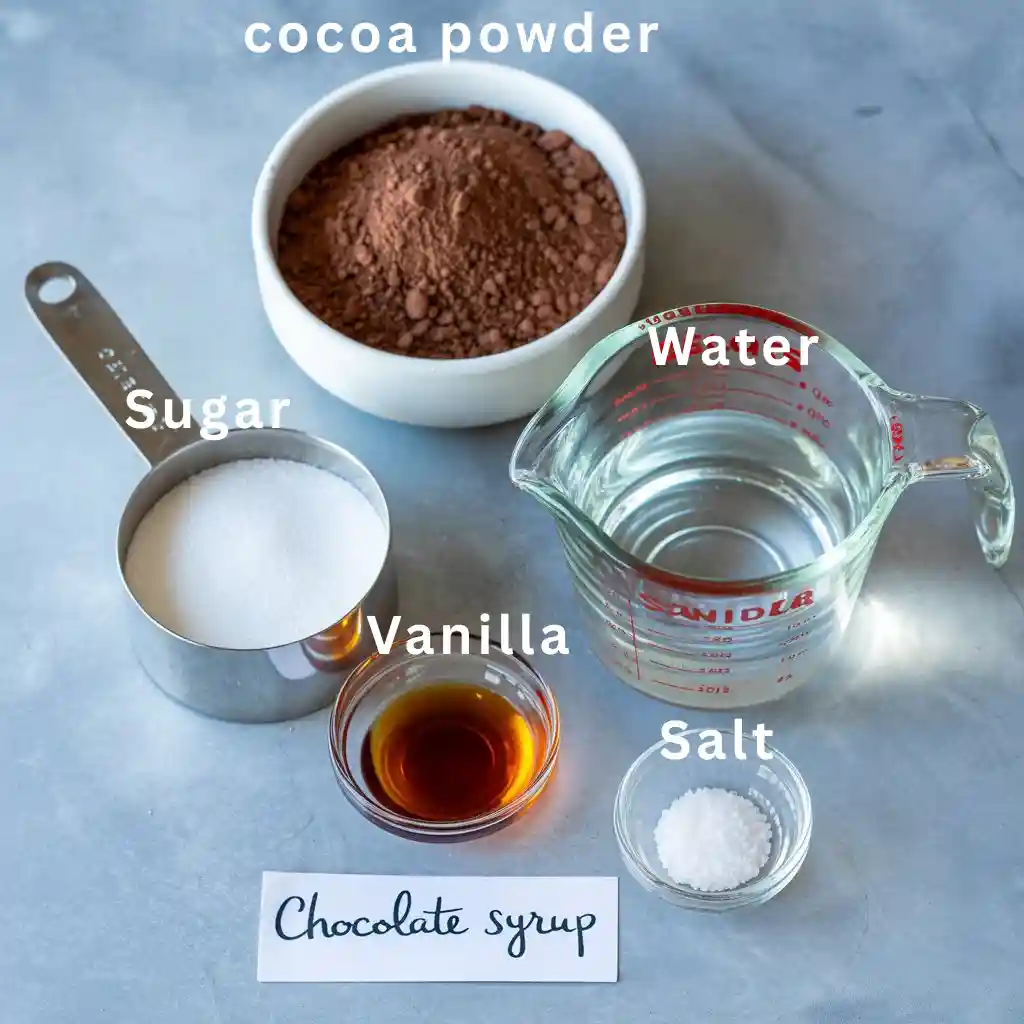
- ¾ cup unsweetened cocoa powder
Choose a good-quality cocoa for a rich, bold chocolate taste. Dutch-processed cocoa gives a smoother, less bitter finish, but natural cocoa works beautifully too. - 1 cup granulated sugar
White sugar keeps things classic and lets the chocolate shine. If you prefer a slightly richer flavor, you can swap in light brown sugar for a caramel-like undertone. - 1 cup water
Sounds simple, but water is key to dissolving the cocoa and sugar into a pourable, glossy syrup. - ¼ teaspoon salt
Just a pinch enhances the overall flavor, balancing out the sweetness and making the chocolate taste even more intense. - 1 teaspoon pure vanilla extract
Add this after cooking to preserve its aroma. Vanilla rounds out the flavors and gives the syrup that irresistible bakery-style finish.
Optional Add-Ins
Want to level things up or make the syrup your own? Try these variations:
- Espresso powder (½ teaspoon) – Deepens the cocoa flavor without tasting like coffee
- Cinnamon (¼ teaspoon) – Adds warmth and a hint of spice
- Coconut milk (replace water) – For a creamy, tropical twist
- Maple syrup (replace part of the sugar) – Natural sweetness with a bold flavor profile
This easy chocolate sauce is highly customizable, so don’t be afraid to experiment with what you love or have on hand. Once your ingredients are lined up, we’re ready to bring the magic to life on the stovetop!
How to Make Chocolate Syrup
Follow these simple steps for an easy chocolate sauce that’s rich, smooth, and ready in about 10 minutes:
Combine Dry Ingredients
- In a medium saucepan, whisk together ¾ cup unsweetened cocoa powder and 1 cup granulated sugar.
- This dry mix prevents lumps and gives you full control over the chocolate intensity.
Add Water and Mix
- Slowly pour in 1 cup water, whisking constantly.
- Mix until you achieve a glossy, lump-free texture.
- Tip: Take your time—fully dissolving the sugar ensures a smooth syrup base.
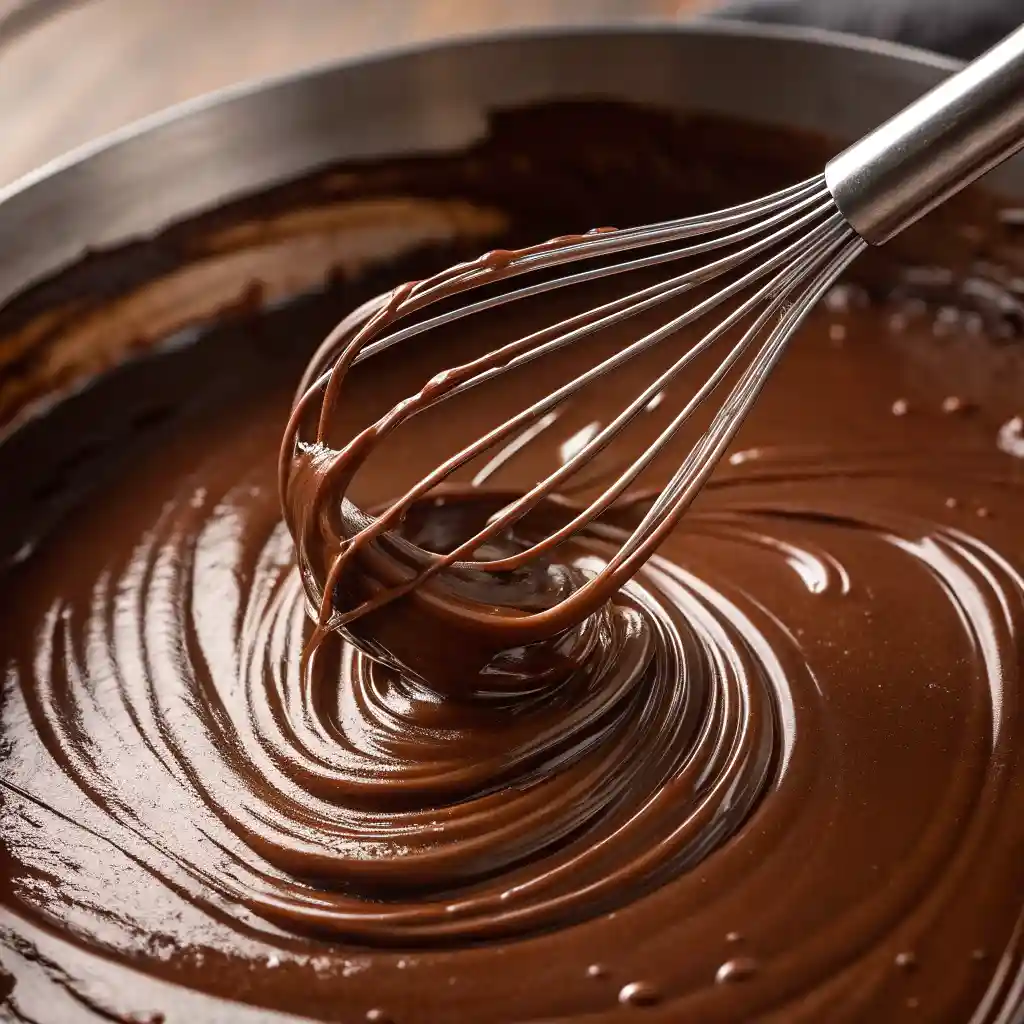
Heat to a Gentle Simmer
- Place the saucepan over medium heat.
- Continue whisking as the mixture warms.
- When small bubbles form around the edges, reduce heat to maintain a gentle simmer.
Thicken the Syrup
- Let it simmer for 4–5 minutes, stirring occasionally.
- Tip: If it coats the back of a spoon and leaves a clean trail, it’s ready.
Finish with Flavor
- Remove from heat.
- Stir in 1 teaspoon vanilla extract and a pinch of salt.
- These additions enhance the flavor and aroma.
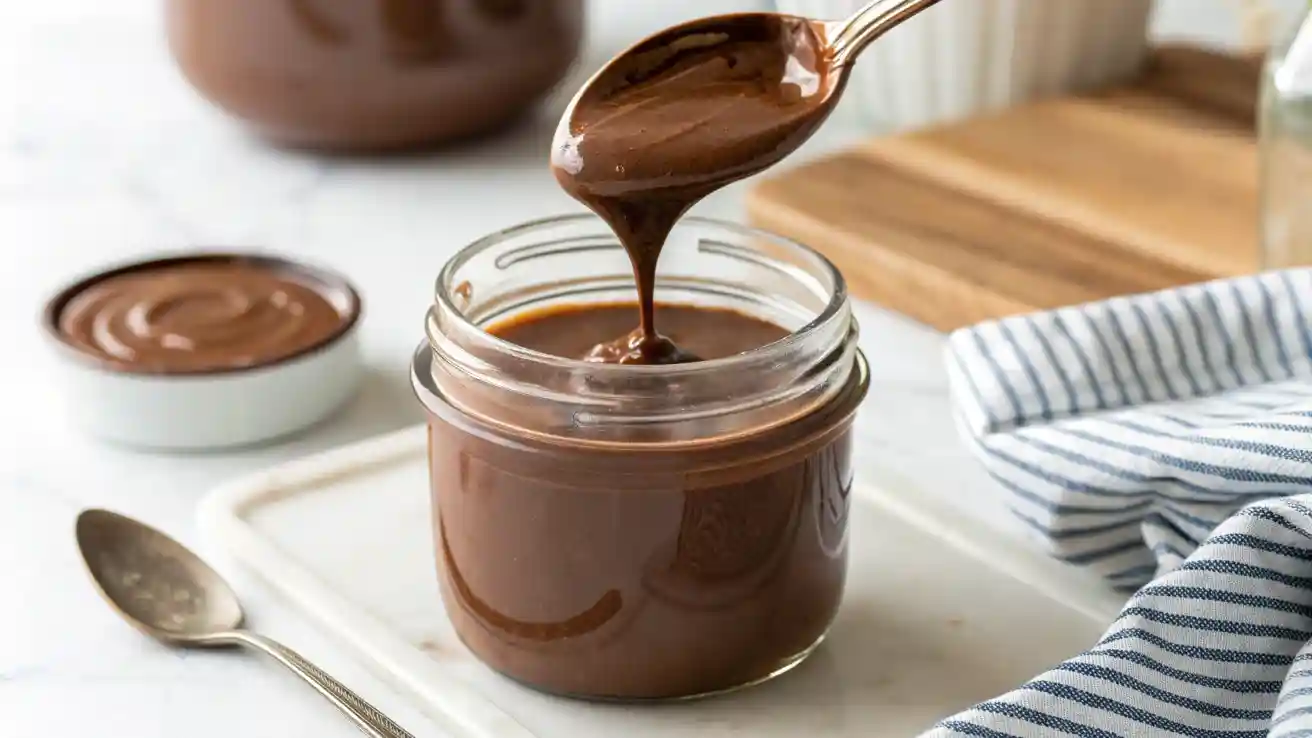
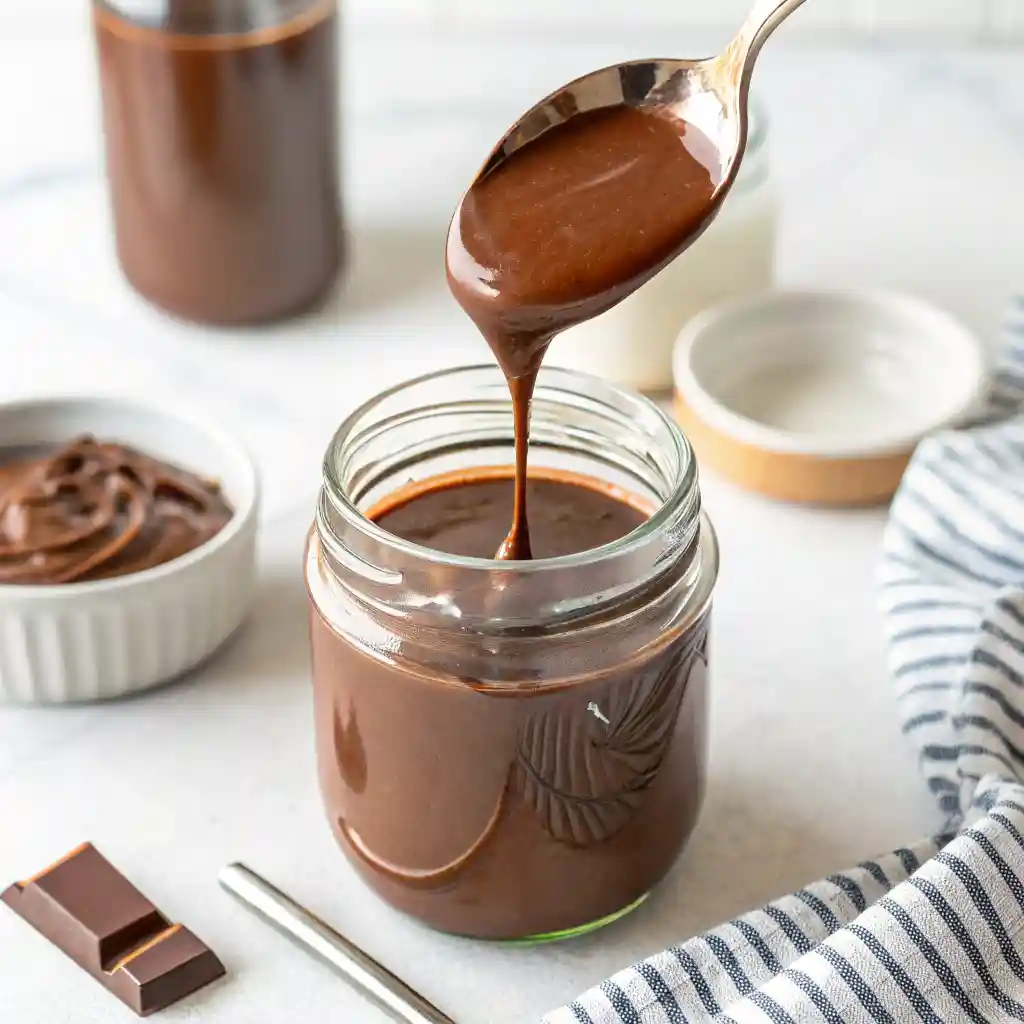
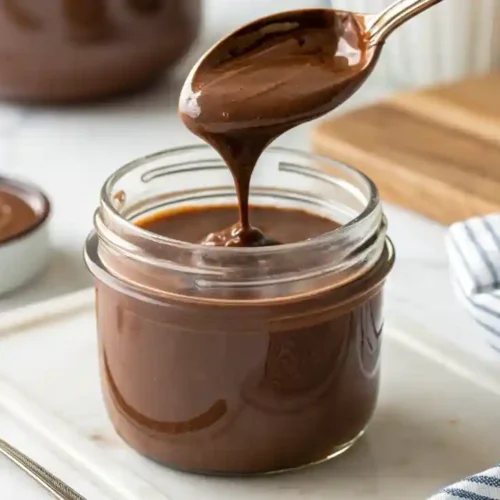
Cool and Store
- Allow the syrup to cool for 10–15 minutes.
- Transfer to an airtight jar or bottle.
- Store in the refrigerator for up to 3 weeks.
Chef’s Tip: If your syrup thickens too much when chilled, simply whisk in a splash of warm water before drizzling.
Enjoy your quick‑prep, homemade chocolate syrup—perfect for sundaes, coffee, or any dessert craving!
Pro Tips and Fun Variations
Want to make your chocolate syrup recipe even better—or put your own twist on it? These tips and creative ideas will help you get the most out of every rich, chocolatey drop.
Pro Tips for the Best Chocolate Syrup
- Whisk continuously
Keep whisking during the first few minutes of cooking to prevent clumps and ensure the cocoa fully dissolves. This creates a smoother, glossier syrup. - Don’t boil it
A gentle simmer is all you need. Boiling can cause the syrup to scorch or become too thick as it cools. - Taste as you go
Cocoa brands vary in intensity. Taste your syrup before adding vanilla—adjust sugar or cocoa slightly if needed for your preferred balance. - Use a fine-mesh strainer (optional)
For an ultra-silky texture, strain the syrup before bottling. This step isn’t essential, but it elevates the finish.
Flavor Variations to Try
Want to spice things up—or sweeten them differently? These easy swaps can transform your chocolate syrup into something uniquely yours:
- Espresso Kick:
Add ½ teaspoon of instant espresso powder to deepen the cocoa flavor—perfect for drizzling into coffee or over tiramisu. - Cinnamon Spice:
Stir in ¼ teaspoon ground cinnamon for a warm, cozy note that pairs beautifully with fall desserts. - Mint Chocolate:
Swap vanilla for peppermint extract (start with ¼ teaspoon—it’s strong!) for a cool, refreshing twist. - Coconut Cream Syrup:
Replace the water with canned coconut milk for a rich, tropical version that’s fantastic over fruit or frozen yogurt. - Maple Sweetened:
Replace half the sugar with real maple syrup for a more natural sweetness and a hint of earthy depth.
Whether you’re keeping it classic or getting creative, this homemade chocolate sauce invites experimentation. Have fun with it—you really can’t go wrong when chocolate’s involved.
Serving Suggestions to Savor Every Drop
This luscious homemade chocolate syrup is more than just a topping—it’s a finishing touch that turns everyday treats into indulgent desserts. Here are some fun, creative, and downright delicious ways to enjoy it:
Classic and Comforting
- Drizzle over ice cream:
Vanilla, chocolate, or even mint chip—this syrup transforms any scoop into a full-on sundae experience. - Chocolate milk, upgraded:
Stir 2–3 tablespoons into a cold glass of milk for a better-than-store-bought version of everyone’s childhood favorite. - Warm it up for hot cocoa:
Mix a spoonful into hot milk and top with marshmallows for a cozy, rich mug of homemade hot chocolate.
Breakfasts and Brunches
- Pour over pancakes and waffles:
Say goodbye to maple syrup (just for today!) and treat yourself to a thick chocolate drizzle on your morning stack. - Swirl into oatmeal or yogurt:
Add a decadent touch to a healthy breakfast with just a light swirl—instant satisfaction without going overboard.
Dessert-Ready Ideas
- Drip onto cheesecake or brownies:
Elevate a slice of cheesecake or a fudgy brownie with a shiny chocolate ribbon that looks as good as it tastes. - Fruit dipping station:
Set out a bowl of warm chocolate syrup with fresh strawberries, banana slices, or apple wedges for a no-fuss dessert.
Sips and Swirls
- Mocha magic:
Add a spoonful to your morning coffee or latte for a DIY mocha that tastes like it came from your favorite café. - Milkshakes and smoothies:
Blend it into your favorite drinks for a creamy chocolate boost—great for both kids and grown-up cravings.
How to Store Chocolate Syrup
To keep your syrup tasting fresh and smooth:
- Cool completely before sealing to prevent condensation.
- Store in an airtight glass jar or squeeze bottle.
- Keep it in the refrigerator for up to 3 weeks.
- If it thickens over time, just stir in a splash of warm water and give it a good shake.
Homemade chocolate syrup is always just a spoonful away from making your moment sweeter—so keep it stocked and ready for drizzling!
Final Thoughts
There’s something truly special about making your own chocolate syrup from scratch—the rich aroma, the glossy texture, and that first warm drizzle over your favorite treat. It’s a simple pleasure that adds a touch of indulgence to everyday moments, whether you’re topping breakfast pancakes or dressing up dessert.
With just a few pantry staples and under 15 minutes, you’ve created a versatile, better-than-store-bought chocolate sauce that’s free of preservatives and full of flavor. Plus, it stores beautifully, giving you a ready-to-pour delight whenever the craving strikes.
So next time you’re tempted to reach for that store-bought bottle, remember: you’ve got everything you need to make magic at home—one delicious spoonful at a time.
Chocolate Syrup
Ingredients
- ¾ cup unsweetened cocoa powder
- 1 cup granulated sugar
- 1 cup water
- ¼ teaspoon salt
- 1 teaspoon pure vanilla extract
Instructions
Whisk dry ingredients:
- In a medium saucepan, whisk together cocoa powder and sugar until well combined.
Add water:
- Gradually pour in the water while whisking to form a smooth mixture.
Heat the mixture:
- Place the saucepan over medium heat and bring the mixture to a gentle simmer, stirring frequently.
Simmer and thicken:
- Let it simmer for 4–5 minutes until slightly thickened, stirring occasionally.
Add vanilla and salt:
- Remove from heat. Stir in vanilla extract and salt.
Cool and store:
- Allow to cool before transferring to a jar or bottle. Store in the refrigerator.
Notes
| Nutrient | Amount |
|---|---|
| Calories | 90 kcal |
| Total Fat | 1g |
| Saturated Fat | 0.5g |
| Carbohydrates | 22g |
| Sugar | 19g |
| Protein | 1g |
| Fiber | 1g |
| Sodium | 45mg |
Note: Nutrition values are approximate and may vary based on specific ingredients used.
FAQs
Can I use cocoa powder instead of melted chocolate?
Absolutely! In fact, this recipe is designed specifically for cocoa powder. It gives you that deep, rich chocolate flavor without the heaviness or added fats of melted chocolate. Plus, it blends more easily and creates a smoother syrup.
How long does homemade chocolate syrup last in the fridge?
Stored in a clean, airtight jar, your syrup will stay fresh for up to 3 weeks in the refrigerator. If it thickens over time, just stir in a tiny splash of warm water to bring it back to pourable perfection.
Can I make it without sugar?
You can experiment with natural sweeteners like maple syrup, honey, or monk fruit, but keep in mind the texture and shelf life may change slightly. Start with less and adjust to taste—some substitutes are sweeter than sugar.
Why is my syrup too thick or too runny?
The key is in the simmering time. If your syrup is too thick, you may have cooked it a little too long—just thin it with water. If it’s too runny, simmer it for a few more minutes while stirring. It will also thicken slightly as it cools.
Is this chocolate syrup gluten-free and vegan?
Yes! As long as you’re using gluten-free cocoa powder and no dairy-based add-ins, this recipe is naturally both gluten-free and vegan. Always double-check ingredient labels just to be safe.
Can I freeze chocolate syrup?
It’s best stored in the fridge, but you can freeze it if needed. Let it cool completely, pour into a freezer-safe container, and leave a little room for expansion. Thaw in the fridge overnight and stir well before using.