

With just two ingredients — rich baking chocolate and ripe strawberries — this recipe proves that simple can still be stunning. It takes only 20 minutes from start to finish, yet the result looks like something from a high-end dessert shop. The secret? A smart tempering method that gives the chocolate a glossy finish and a satisfying snap. No fancy tools required, just a little technique and care. Whether you’re making them for a special occasion or a quick treat, these chocolate covered strawberries always impress.
Table of Contents

Ingredients Needed
For the Chocolate Coating
- 10 ounces of Ghirardelli baking chips, bittersweet, semi-sweet, or milk chocolate
(Choose baking chips over standard chocolate chips for smoother melting and a richer taste)
For the Strawberries
- 2 pounds of fresh strawberries with stems attached
(Look for firm, bright red berries with green caps still intact. Avoid overripe or mushy ones)
Optional toppings like chopped nuts, shredded coconut, or crushed cookies can be prepared in small bowls if you plan to decorate.
How to Make Chocolate Covered Strawberries
- Wash and Dry the Strawberries
Rinse the strawberries under cool water and gently pat them dry with paper towels. Let them air dry completely. Any leftover moisture can cause the chocolate to seize or slip off, so take your time here. - Bring Strawberries to Room Temperature
Set the berries out for at least 15 minutes before dipping. Cold strawberries can create condensation, which affects how the chocolate sticks. - Prepare Your Workstation
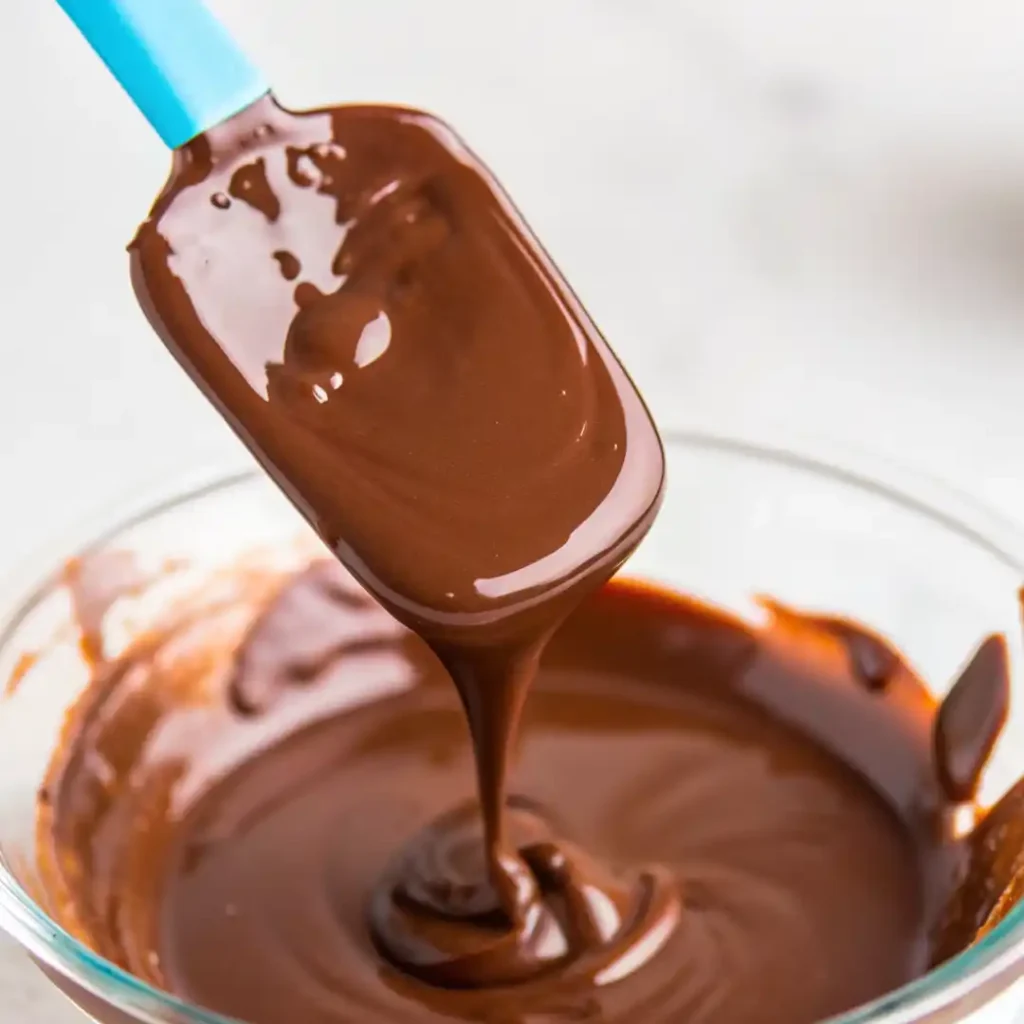
Line a baking sheet with parchment or wax paper. Set out any toppings you plan to use in small plates for easy access. - Melt the Chocolate
Use one of two methods:- Microwave method: Place the chocolate chips in a microwave-safe bowl. Heat in 30-second bursts, stirring well between each round. Stop as soon as the chocolate is mostly melted, then stir until smooth.
- Double boiler method: Place a heat-safe bowl over a pot of simmering water. Make sure the bottom of the bowl does not touch the water. Stir continuously until the chocolate is melted and smooth.
- Dip the Strawberries
Hold a strawberry by the stem and dip it into the melted chocolate. Gently swirl to coat, then lift and allow excess chocolate to drip off. For a clean finish, twist slightly before placing it onto the lined baking sheet. - Add Toppings or Drizzle
While the chocolate is still wet, roll or sprinkle the berry with toppings if desired. To drizzle with white chocolate, dip a fork into melted white chocolate and flick it back and forth over the strawberries. - Let Them Set
Place the dipped strawberries in the refrigerator for about 15 minutes. Once the chocolate is firm, they are ready to serve or store.

Expert Tips for Success
Let Strawberries Warm Up
Take the strawberries out of the fridge at least 15 to 30 minutes before dipping. This helps prevent condensation which can make the chocolate slide off.
Pick the Right Chocolate
Use high-quality baking chocolate instead of basic chocolate chips. Baking chocolate melts more smoothly and gives a better texture and flavor.
Get Creative with Toppings
Add your own twist with crushed Oreos, toasted coconut, graham cracker crumbs or a white chocolate drizzle. Set toppings in shallow bowls before dipping for easy access.
Keep Tools Dry
Even a drop of water can ruin melted chocolate. Make sure bowls, utensils and strawberries are completely dry before you begin.
Use a Toothpick for Clean Dipping
For extra neat results, insert a toothpick near the stem. This gives you better control and keeps your fingers out of the chocolate.
How to Store Them
Preventing Chocolate “Sweat”
Chocolate releases moisture when moved between temperatures too quickly. To avoid condensation, let the dipped strawberries sit in a cool spot until the chocolate firms up. If you must refrigerate them, place them uncovered on a baking sheet lined with parchment. Avoid sealed containers which trap moisture.
Can You Freeze Chocolate Covered Strawberries?
No. Freezing ruins the texture. As strawberries thaw, they release water which makes the chocolate soft and patchy.
How Long Do They Last?
For the best taste and texture, enjoy them within the first 24 hours. If stored properly in the fridge, they can last up to 48 hours, but the shine and snap may fade with time.
Why This Recipe Works Every Time
Chocolate covered strawberries look fancy but take little effort. With only two ingredients and simple steps, you get a dessert that feels special without any stress. The method here gives you a glossy shell, a clean dip, and toppings that stay in place. Using baking chocolate means smoother melting and better flavor. The room temperature trick and drying tips help everything stick just right.
These are perfect for holidays, gifts, or when you just want something sweet and fresh. If you tried this recipe, leave a comment and give it a star rating. We’d love to know how yours turned out.
Did you try a twist like a white chocolate drizzle or cookie crumb coating? Share your ideas below. And if you loved it, post a photo on Pinterest or Facebook to show off your creation.
Don’t miss our creamy and irresistible chocolate-covered Peanut Butter Balls.

Chocolate Covered Strawberries
Ingredients
Chocolate Coating
- 10 oz Ghirardelli baking chips (bittersweet, semi-sweet, or milk chocolate) Use baking chips for smoother melting and richer taste
Strawberries
- 2 lb fresh strawberries with stems attached Look for firm, bright red berries; avoid mushy ones
Optional Toppings
- chopped nuts, shredded coconut, or crushed cookies Prepare in small bowls for easy decorating
Instructions
- Rinse the strawberries under cool water and gently pat them dry with paper towels. Let them air dry completely to avoid chocolate slipping off.
- Leave strawberries at room temperature for at least 15 minutes before dipping to prevent condensation.
- Line a baking sheet with parchment or wax paper and set out any desired toppings in shallow bowls or plates.
- Melt the chocolate using either method: Microwave: Heat chocolate chips in 30-second intervals, stirring between each until melted. Double Boiler: Stir continuously over simmering water until smooth.
- Hold each strawberry by the stem and dip into melted chocolate. Gently swirl and allow excess to drip off. Twist slightly for a clean finish before placing on the baking sheet.
- While chocolate is still wet, roll or sprinkle toppings onto the strawberries. For drizzling, use a fork dipped in melted white chocolate.
- Refrigerate the dipped strawberries for about 15 minutes or until chocolate is firm.
Notes
Nutrition Facts (Per Serving)
- Calories: 40 kcal
- Carbohydrates: 4 g
- Fat: 2 g
- Sodium: 2 mg
- Potassium: 71 mg
- Sugar: 2 g
- Vitamin A: 5 IU
- Vitamin C: 17.8 mg
- Calcium: 11 mg
- Iron: 0.3 mg
FAQs
Which chocolate is best to melt for strawberries?
Baking chocolate is the best choice. Brands like Ghirardelli or Lindt melt smoothly and give a rich flavor. Avoid regular chocolate chips made for cookies, as they often contain stabilizers that make melting tricky.
How do I get chocolate to stick to my strawberries?
Make sure the strawberries are completely dry and at room temperature. Any moisture or cold surface can cause the chocolate to slide off or clump.
Should strawberries be cold when you dip them in chocolate?
No. Cold strawberries create condensation, which prevents the chocolate from sticking properly. Always let them sit out for 15 to 30 minutes before dipping.
What’s the best way to melt chocolate for chocolate-covered strawberries?
The microwave method is quick and works well if you heat in short bursts and stir often. A double boiler gives more control and reduces the risk of overheating.
What are common mistakes when dipping strawberries?
Using wet berries, overheating chocolate, or dipping cold strawberries are the most common problems. Also, avoid adding water to melted chocolate since it can cause seizing.
Why can’t you put chocolate covered strawberries in the fridge?
Fridges cause condensation, which dulls the chocolate and makes the surface sticky. If you need to refrigerate them, keep them uncovered and avoid placing them near moisture.