

I still remember the first time I made a royal icing recipe that actually worked. The icing held its shape, dried smooth, and gave my cookies that clean bakery look. That moment changed how I decorate forever. If you want icing that pipes neatly, floods evenly, and dries with a soft bite, you are in the right place. This guide gives you a simple method that works for both beginners and experienced bakers, without confusion or guesswork.
Table of Contents
Why This is the Best Royal Icing Recipe

This recipe stands out because it uses a simple one icing method. You do not need separate batches for outlining and flooding. The texture starts thick enough to hold clean lines, yet you can adjust it easily to flow across cookies without gaps. This saves time and reduces waste.
Another strong point is the fast drying time. Unlike basic glaze icing that can take many hours, this one sets in about two hours at room temperature. That means you can layer designs sooner without long waiting.
The final texture is also a big win. It dries firm on the outside but keeps a soft bite inside. You get a clean finish that still tastes good, not hard or brittle.
Ingredients Needed
Here is everything you need to make a smooth and reliable royal icing. Each ingredient plays a clear role in texture, taste, and structure.
For the Base Icing
- 4 cups (480g) confectioners’ sugar, sifted
This creates a smooth finish and removes lumps. Keep extra on hand in case you need to thicken the icing. - 3 tablespoons meringue powder
Use meringue powder, not plain egg white powder. It helps the icing whip up well and dry with a stable structure. - 9 tablespoons room temperature water
This controls the consistency. You may need a little more depending on your environment.
For Flavor
- 1 teaspoon pure vanilla extract
Adds a light, classic flavor.
You can also use half a teaspoon of lemon, coconut, or peppermint extract for a different taste.
Optional for Decorating
- Gel food coloring
Gel colors give strong shades without thinning the icing. Start with a small amount and build up slowly.
How to Make Royal Icing Recipe
Follow these steps closely for a smooth icing that pipes well and dries with a clean finish. No prep time is needed, but make sure all tools are clean and dry before you begin. Any grease can affect the final result.
- Mix the dry ingredients
Place the sifted confectioners’ sugar and meringue powder into a large bowl. Use a whisk attachment with a hand mixer or stand mixer. Start mixing on low speed for a few seconds to combine everything evenly. - Add liquid and flavor
Pour in the room temperature water. Add vanilla extract or any flavor you prefer. Mix on low speed at first, then increase to high speed. This helps prevent sugar from spilling out of the bowl. - Whip until smooth and glossy
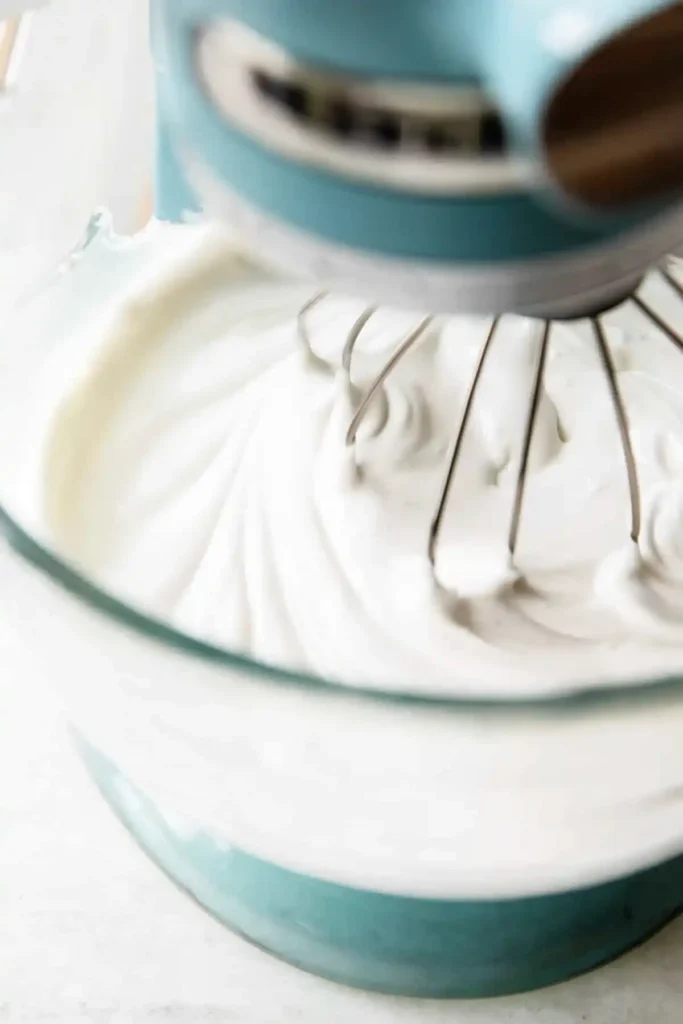
Beat the mixture on high speed for about 1.5 to 2 minutes. The icing should look bright white and slightly thick. When you lift the whisk, the icing should fall back into the bowl and smooth out within 5 to 10 seconds. This is a key visual cue for proper consistency. - Adjust the texture if needed
If the icing feels too thick, add more water slowly, about 1 tablespoon at a time. Mix well after each addition. Dry air may require more water.
If the icing looks too thin, keep mixing to build structure or add a small amount of sifted sugar. The goal is a smooth flow that still holds shape briefly. - Color the icing
Divide the icing into separate bowls if you want different colors. Use a toothpick to add a small amount of gel food coloring. Stir gently until the color spreads evenly. Add more color if needed. If the icing thickens during mixing, add a few drops of water to keep the right texture. - Apply and let it set
Spread or pipe the icing onto cookies in a thin, even layer. It will dry at room temperature in about 2 hours. Thicker layers need more time. If you plan to add layers or details, let the base set first. - Speed up drying if needed
Place decorated cookies in the fridge if you need faster setting between layers. This helps the icing firm up without losing its smooth surface.

Mastering Consistency (The 5 to 10 Second Rule)
Getting the right consistency is what makes your royal icing easy to use and clean in finish. The simple way to test it is the 5 to 10 second rule. Lift some icing with a spoon or whisk, then let it fall back into the bowl. Watch how long it takes to smooth out.
If it disappears in about 5 to 10 seconds, your icing is ready for flooding and general decorating. It will spread evenly but still hold a soft shape.
If the icing feels too thick, add water slowly, one tablespoon at a time. Mix well after each addition until it loosens to the right flow.
If the icing looks too thin and runny, keep whipping it. This adds air and helps it thicken. You can also mix in a bit more sifted confectioners’ sugar if needed.
A key tip to remember is that mixing or stirring longer will naturally make the icing thicker. Always adjust in small steps to stay in control.

Troubleshooting and Pro Tips
Even with a great recipe, small issues can happen. These simple tips help you fix problems fast and keep your icing smooth and easy to work with.
Keep Icing from Hardening
Royal icing dries quickly when exposed to air. While you work, place a damp paper towel directly over the surface of the icing in the bowl. This keeps it soft and ready to use. You can also cover the bowl with plastic wrap for extra protection.
Fix Air Bubbles and Color Bleeding
Air bubbles can ruin a smooth finish. After piping or flooding, use a scribe tool or a toothpick to gently spread the icing and pop any bubbles. This also helps fill small gaps.
To avoid colors bleeding into each other, let each layer dry before adding the next. Working too fast can cause colors to mix.
Speed Up Setting Time
If you need faster results, place your decorated cookies in the fridge. This helps the icing set quicker, especially when you plan to add more layers or details. Just make sure the cookies sit flat so the icing stays even.
Make Ahead and Storage Guide
Royal icing stores well if you handle it the right way. This helps you save time and avoid waste, especially when working on large batches.
Refrigeration
Place leftover icing in an airtight container and store it in the fridge for up to 3 days. Before using it again, give it a good stir or a quick mix. The texture may separate slightly, but it will come back together بسهولة.
Freezing Icing
You can freeze extra icing in zip top bags. Press out as much air as possible before sealing. Store it in the freezer for up to 2 months. When ready to use, thaw it in the fridge, then mix well to restore the smooth texture.
Freezing Decorated Cookies
Once the icing is fully dry and set, you can freeze decorated cookies for up to 3 months. Place them in a sealed container with layers separated by parchment paper. Let them thaw at room temperature before serving to keep the design intact.
Conclusion
This royal icing recipe gives you full control without stress. You get one simple method, a smooth texture, and a finish that looks clean on every cookie. It dries fast, holds detail, and still tastes good with a soft bite. That balance makes it a go to choice for both quick batches and detailed designs.
If you try this recipe, share your result. Leave a comment and a star rating to help others. Your feedback also helps improve future recipes.
Feel free to share your decorated cookies on Pinterest or Facebook. It is always fun to see different styles and color ideas.
What did you create with your icing? Did you try a new flavor or color mix? Tell us below.
YOU MIGHT ALSO LIKE…
- Sugar Cookies
- Gingerbread Cookies
- Chocolate Chip Cookies
- Cake Mix Cookies
- Brown Butter Chocolate Chip Cookies

Royal Icing Recipe
Ingredients
Base Icing
- 4 cups confectioners’ sugar (sifted)
- 3 tablespoons meringue powder
- 9 tablespoons water (room temperature)
Flavor
- 1 teaspoon vanilla extract or alternative flavor extract
Optional
- gel food coloring as needed
Instructions
- In a large bowl, combine sifted confectioners’ sugar and meringue powder. Mix briefly on low speed to evenly distribute the dry ingredients.
- Add the room temperature water and vanilla extract. Start mixing on low speed, then increase to high speed to prevent splashing.
- Whip the mixture on high speed for 1.5 to 2 minutes until smooth, glossy, and bright white. The icing should fall back into the bowl and smooth out within 5–10 seconds.
- If the icing is too thick, add water gradually (about 1 tablespoon at a time) and mix well. If too thin, mix longer or add a small amount of sifted sugar.
- Divide icing into bowls if using multiple colors. Add gel food coloring with a toothpick and mix gently until evenly colored.
- Pipe or spread icing onto cookies in a thin, even layer. Allow to dry at room temperature for about 2 hours before adding additional layers or details.
- To speed up drying, place decorated cookies in the refrigerator while keeping them level.
Notes
Nutrition Facts (Per Serving)
- Calories: 120
- Carbohydrates: 30g
- Sugar: 29g
- Protein: 0g
- Fat: 0g
- Sodium: 5mg
FAQs
What is the difference between icing and royal icing?
Regular icing is usually softer and may stay slightly wet or sticky. It works well for simple glazing. Royal icing is different because it dries firm and smooth. It is made with meringue powder or egg whites, which helps it set with a clean finish. This makes it perfect for detailed cookie decorating.
What is the 10 second rule for royal icing?
The 10 second rule is a simple way to check consistency. Lift some icing and let it fall back into the bowl. If the surface becomes smooth again in about 10 seconds, the texture is right for flooding. If it takes longer, it is too thick. If it smooths out too fast, it is too thin.
Do you need meringue powder for royal icing?
Meringue powder is not the only option, but it is the easiest and safest choice. It gives stable results and helps the icing whip well. You can also use fresh egg whites, but many people prefer meringue powder for convenience and consistency.
Does royal icing dry hard?
Yes, royal icing dries firm on the outside. That is why it works so well for decorating cookies. With this recipe, the inside keeps a softer bite, so it is not too hard when you eat it.
What makes royal icing crack?
Cracks can happen if the icing dries too fast or if the layer is too thick. Changes in temperature or humidity can also cause issues. To reduce cracking, apply even layers and let each layer set before adding more.
Why add corn syrup to royal icing?
Corn syrup can give the icing a slight shine and a softer texture. It also helps reduce brittleness. Some bakers add a small amount when they want a glossy look and a gentler bite.