
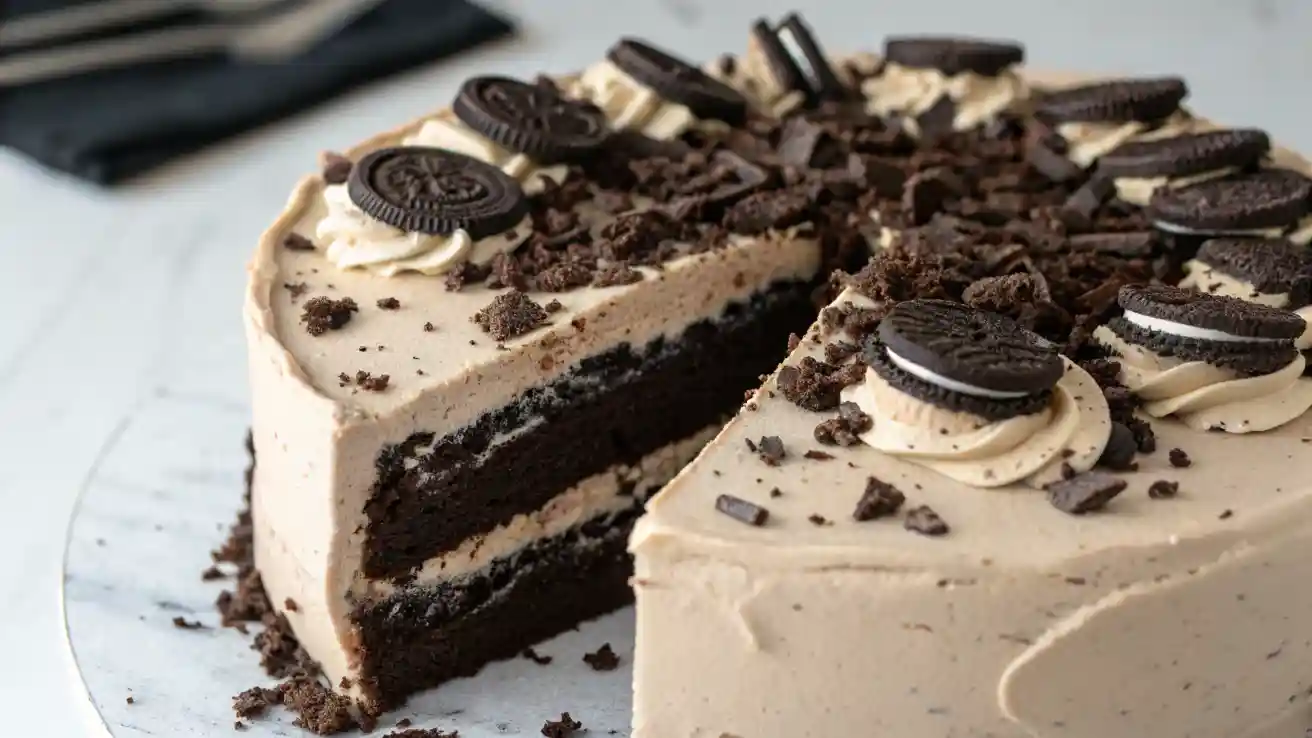
Who doesn’t love a dessert that feels like pure joy in every bite? If you’re an Oreo lover (guilty as charged!), this Oreo Cake is about to become your new go-to treat. Whether you’re planning a birthday surprise, need a quick chocolate fix, or just want a crowd-pleasing dessert that’s as fun to make as it is to eat, this recipe has your back.
What I adore about this cake is how easy it is — no fancy techniques, just simple steps that deliver big flavor. It’s soft, moist, packed with that unmistakable cookies-and-cream goodness, and perfect for any occasion.
Table of Contents
Why You’ll Love This Oreo Cake
Let’s be honest—there’s something downright irresistible about a cake loaded with Oreos. But this isn’t just any Oreo cake. Here’s why you’ll love making (and devouring) this one:
Effortless to Make
You don’t need to be a pastry chef to nail this easy Oreo cake recipe. With minimal prep and pantry-friendly ingredients, it’s perfect for both beginners and seasoned bakers alike.
No-Fail, Crowd-Pleasing Dessert
Whether it’s for a birthday, a holiday, or a simple weeknight indulgence, this cake never disappoints. It’s moist, fluffy, and filled with cookies-and-cream flavor that hits the sweet spot every time.
Customizable and Versatile
Craving a layered masterpiece? Prefer cupcakes instead? This recipe adapts beautifully to whatever you’re in the mood for. You can:
- Swap out frosting for a rich chocolate ganache
- Add extra crushed Oreos between layers
- Even turn it into a vegan Oreo cake with a few simple substitutions
Kid-Friendly and Potluck-Perfect
It’s fun to make with kids (hello, Oreo crushing therapy!) and guaranteed to be the first dessert to disappear at any potluck or gathering.
Looks Fancy, Tastes Like Home
With its gorgeous cookies-and-cream aesthetic, this cake gives serious “bakery vibes” without the stress. Your guests will think it came from a professional, but only you’ll know how quick and simple it truly was.
This isn’t just a dessert—it’s a delicious conversation starter, a baking win, and a sweet memory waiting to happen.
Ingredients You’ll Need
Before you dive into baking, let’s quickly gather everything you need. The beauty of this easy Oreo cake recipe lies in its simple, accessible ingredients—most of which are probably already in your pantry!
Here’s your shopping list:
Dry Ingredients:
- 1¾ cups all-purpose flour (for a fluffy, tender crumb)
- ¾ cup unsweetened cocoa powder (choose high-quality cocoa for richer flavor)
- 1½ teaspoons baking powder
- 1½ teaspoons baking soda
- ½ teaspoon salt
- 1½ cups granulated sugar
- 1½ cups roughly crushed Oreo cookies (about 15 cookies, reserve some for garnish!)
Wet Ingredients:
- 2 large eggs, room temperature
- ¾ cup whole milk, room temperature
- ½ cup vegetable oil (for moisture and tenderness)
- 2 teaspoons pure vanilla extract
- 1 cup boiling water (helps create a rich, moist cake texture)
Frosting and Toppings:
- 1½ cups heavy whipping cream or ready-made whipped cream
- ½ cup powdered sugar
- 8 ounces softened cream cheese (for irresistible frosting texture!)
- Optional: chocolate ganache drizzle, extra Oreos for garnish
Quick tip: Crushing the Oreos is not only fun (stress-relief anyone?), but leaving them slightly chunky adds delightful texture to your cake.
Got your ingredients ready? Perfect—let’s get baking!
How to Make Oreo Cake
Follow this easy Oreo cake recipe and you’ll pull a tender, moist chocolate cake from the oven in just about 35 minutes—no stress, all reward.
- Preheat & Prep
- Heat your oven to 175 °C / 350 °F.
- Lightly grease two 8‑inch round pans, then line the bottoms with parchment paper for a flawless release.
- Heat your oven to 175 °C / 350 °F.
- Whisk the Dry Team
- In a large bowl, sift together flour, cocoa powder, baking powder, baking soda, salt, and sugar.
- Whisk until the mixture looks uniform and lump‑free.
- In a large bowl, sift together flour, cocoa powder, baking powder, baking soda, salt, and sugar.
- Blend the Wet Team
- In another bowl, whisk together the eggs, milk, oil, and vanilla until the mixture is well combined and smooth.
- Pro tip: Room‑temperature eggs mix faster and give the cake extra lift.
- Bring It All Together
- Pour wet ingredients into the dry. Stir gently with a spatula until you see only a few streaks of flour—over‑mixing toughens the crumb.
- Pour wet ingredients into the dry. Stir gently with a spatula until you see only a few streaks of flour—over‑mixing toughens the crumb.
- Add the Secret Sauce
- Carefully stream in the boiling water while stirring. The batter will look thin; that’s the magic behind a super‑moist result.
- Carefully stream in the boiling water while stirring. The batter will look thin; that’s the magic behind a super‑moist result.
- Fold in Cookie Magic
- Sprinkle in 1½ cups of roughly crushed Oreo cookies. Fold just until distributed—big cookie pockets equal bursts of cookies‑and‑cream flavor.
- Sprinkle in 1½ cups of roughly crushed Oreo cookies. Fold just until distributed—big cookie pockets equal bursts of cookies‑and‑cream flavor.
- Bake to Perfection
- Divide batter evenly between pans.
- Bake 30‑35 minutes, or until a toothpick comes out with a few moist crumbs.
- Divide batter evenly between pans.
- Cool Completely
- Let cakes rest in the pans 10 minutes, then invert onto a rack.
- Cool fully before frosting; warm layers will melt your cream cheese whip.
- Let cakes rest in the pans 10 minutes, then invert onto a rack.
- Frost & Finish
- Beat cream cheese, powdered sugar, and whipped cream until light and fluffy.
- Slather frosting between layers and all around the cake.
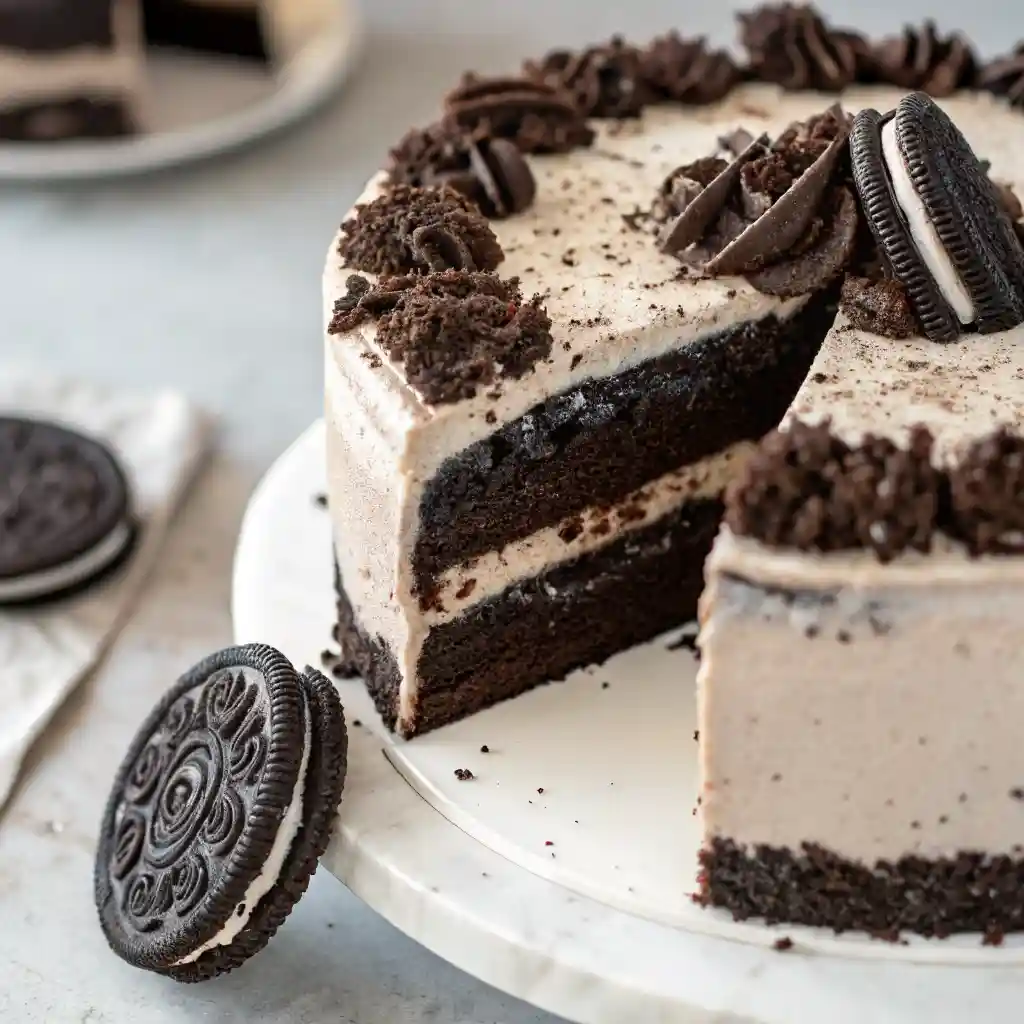
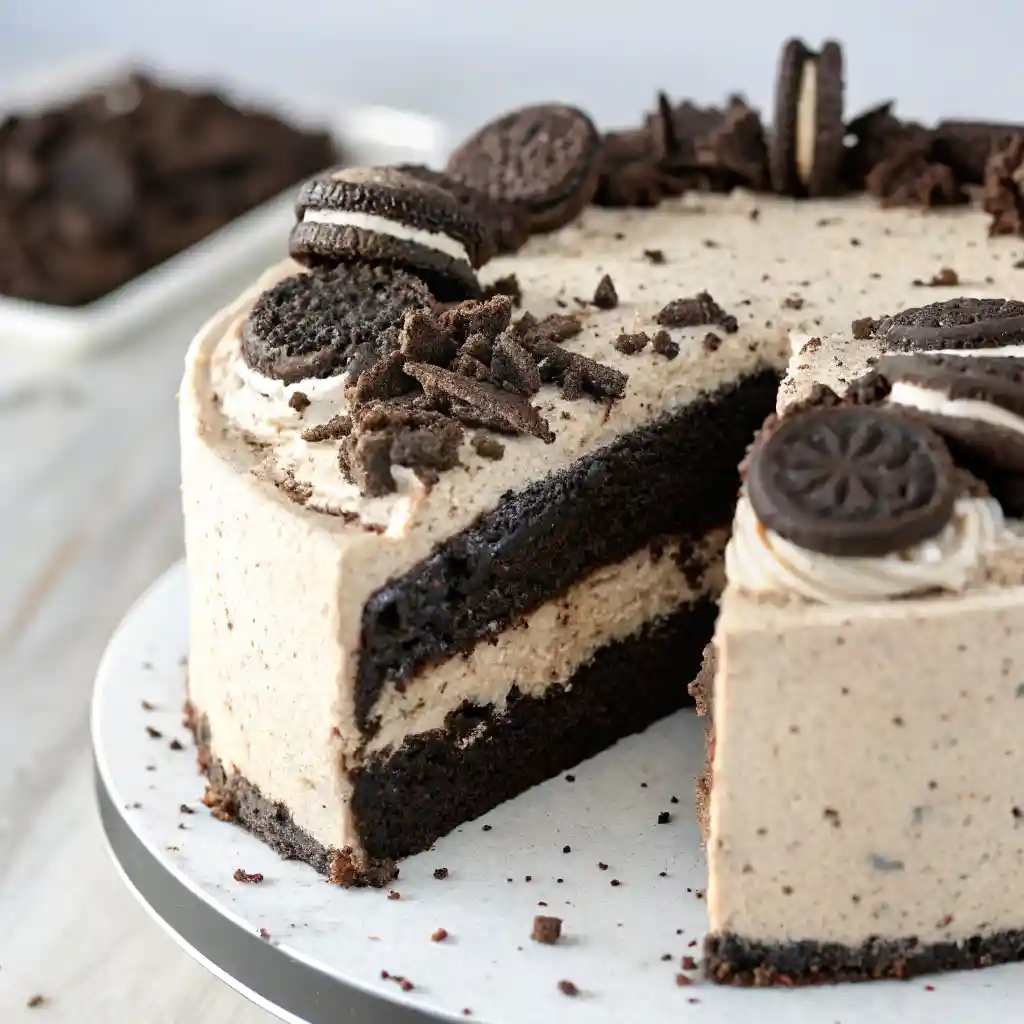
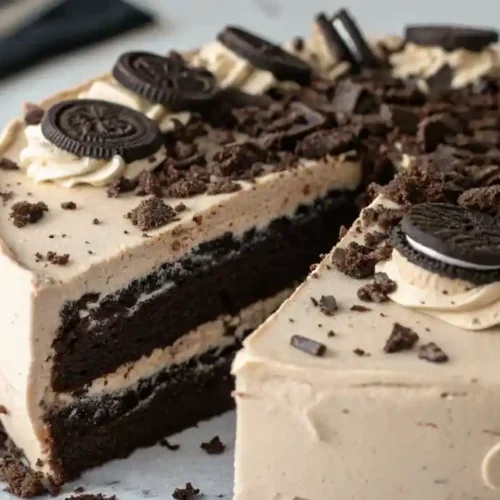
- Garnish with extra Oreo crumbles or a glossy chocolate ganache drizzle for bakery‑shop vibes.
- Beat cream cheese, powdered sugar, and whipped cream until light and fluffy.
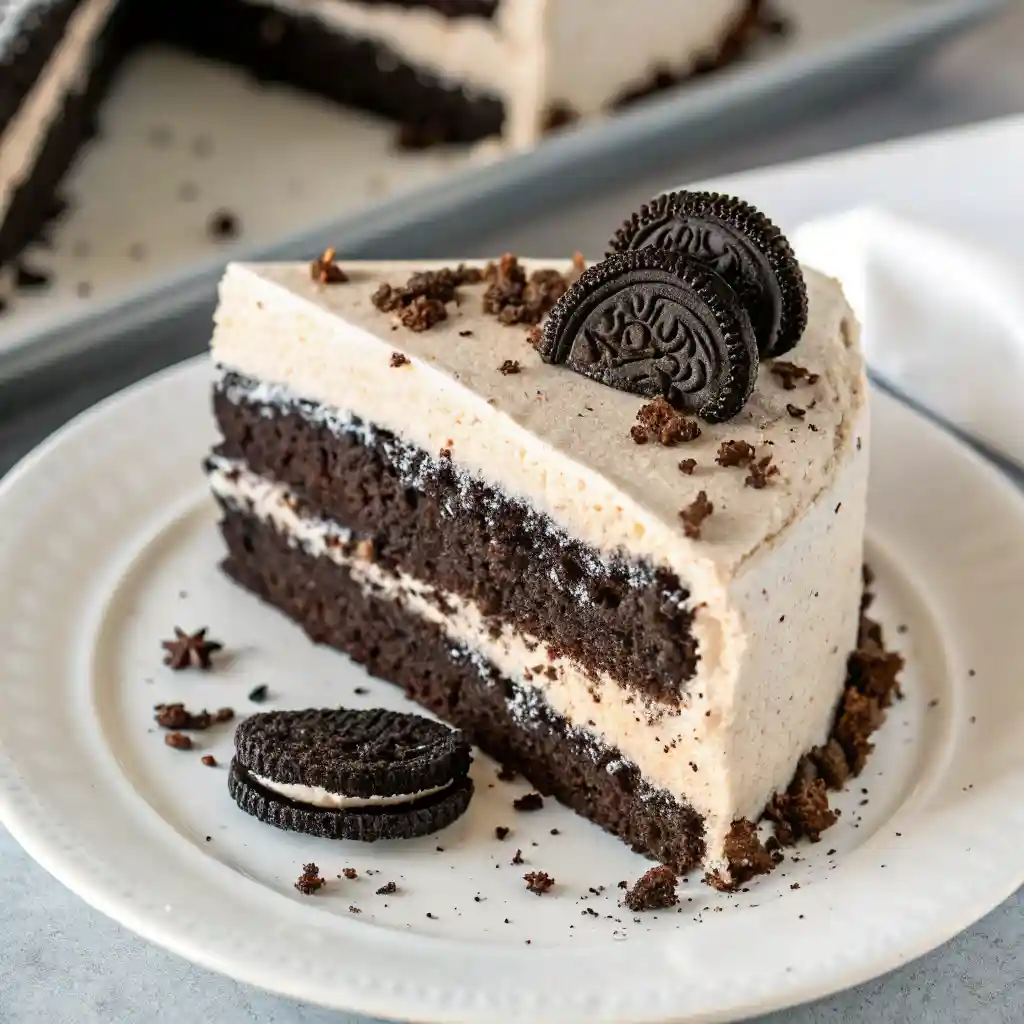
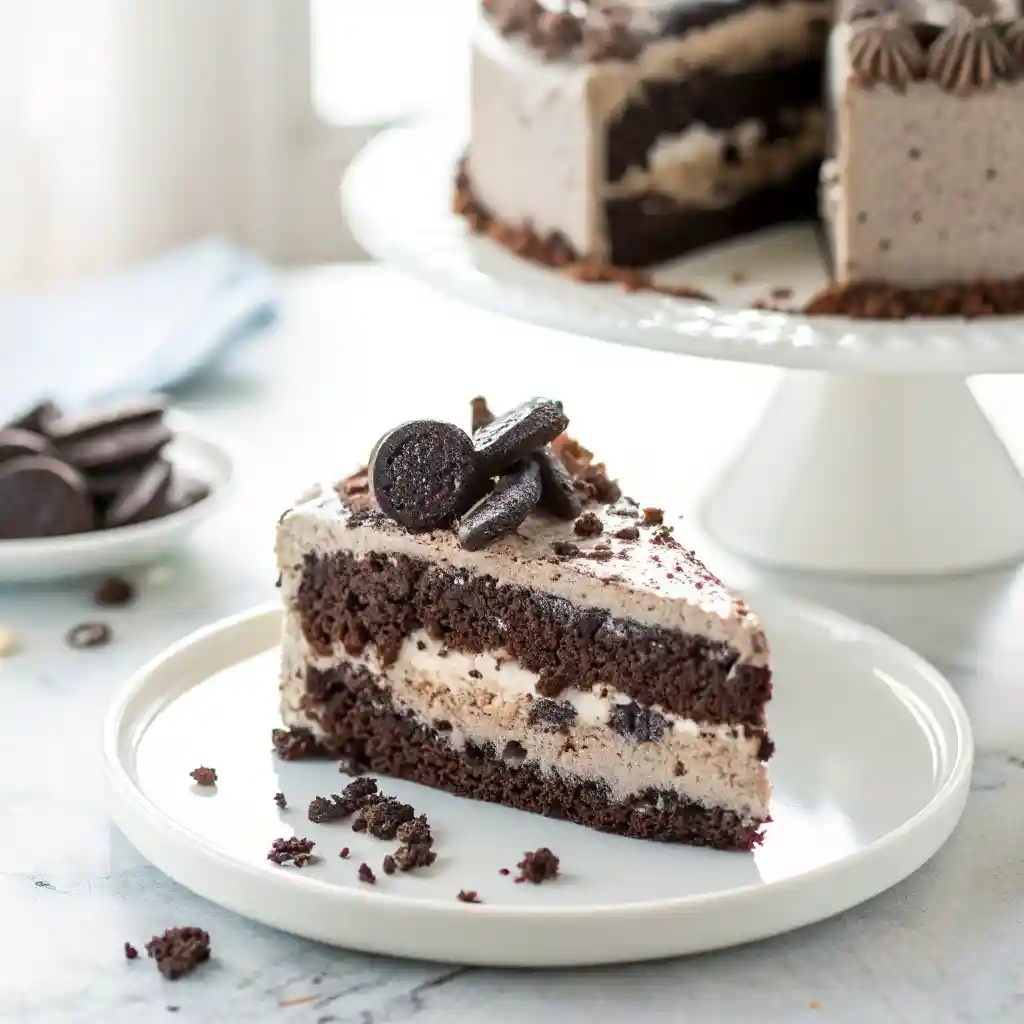
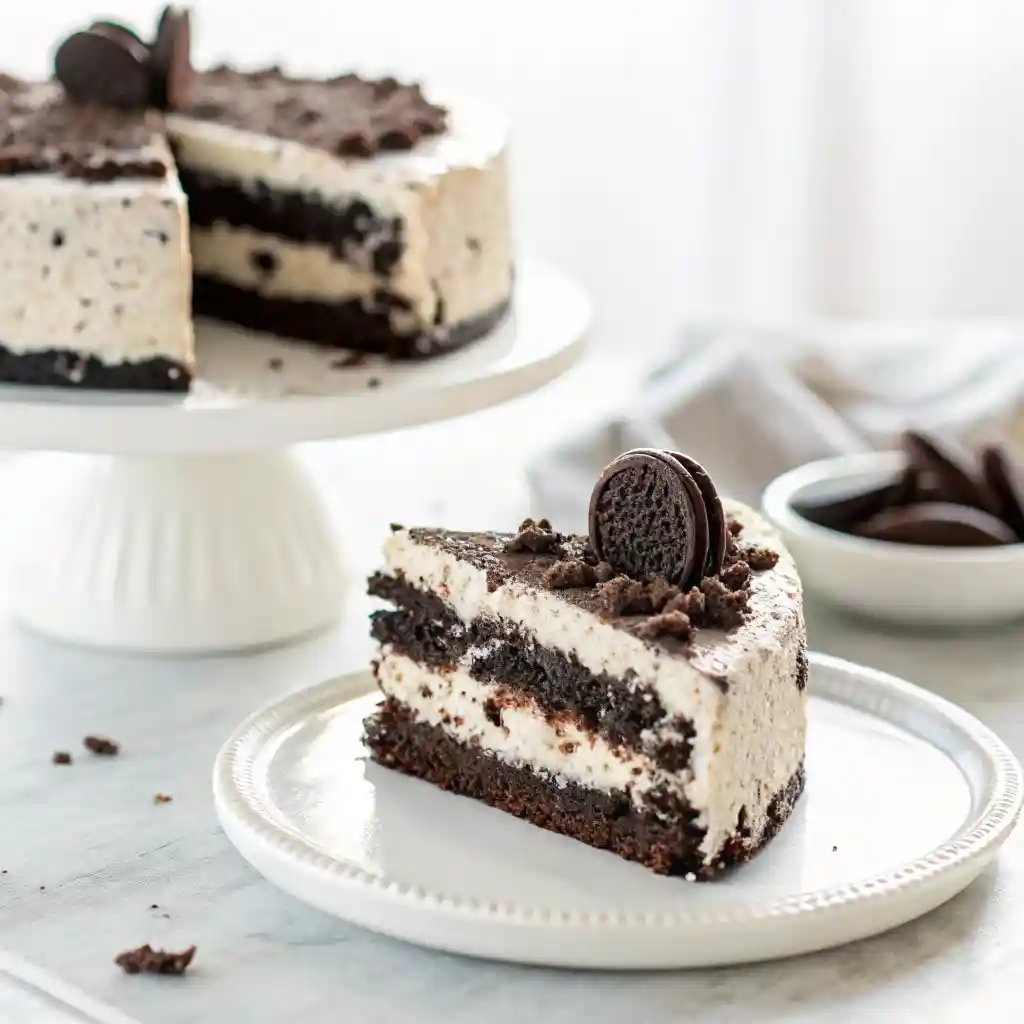
That’s it—you’ve just created a show‑stopping Oreo cake that looks fancy, tastes dreamy, and disappears fast. Enjoy every bite!
Pro Tips and Fun Variations
Want to take your Oreo cake to the next level or make it your own? Here are some insider tips and easy variations that’ll help you get the most out of this sweet masterpiece. Whether you’re baking for picky kids, dietary needs, or just looking to switch it up, these ideas have you covered.
Pro Tips for the Perfect Oreo Cake
- Don’t overmix the batter: Once you add the boiling water and crushed Oreos, stir gently just until combined. Overmixing can lead to a dense, rubbery texture.
- Use room temperature ingredients: Eggs, milk, and cream cheese mix more smoothly when they’re not straight from the fridge—this helps create an even crumb and lump-free frosting.
- Chill before serving: If you have time, pop the frosted cake in the fridge for 30 minutes. It helps the frosting set and makes slicing much cleaner.
- Double the frosting if you love a thick layer: The current recipe gives you a light, whipped cream cheese frosting. Want bakery-style drama? Double it!
Oreo Cake Variations to Try
- Mini Oreo Cupcakes
Pour the batter into cupcake liners and bake for about 18–20 minutes. Great for parties or school treats! - Vegan Oreo Cake
Swap eggs for flax eggs, use plant-based milk, and try a coconut cream frosting. (Bonus: Oreos are accidentally vegan.) - Gluten-Free Option
Use a 1:1 gluten-free flour blend and double-check that your baking powder and Oreos are certified gluten-free. - Oreo Ice Cream Cake Fusion
Skip the baking! Layer crushed Oreos with softened vanilla or cookies-and-cream ice cream in a springform pan, freeze, and top with whipped cream and ganache. - Peanut Butter Oreo Twist
Add ½ cup of creamy peanut butter to your frosting or swirl into the batter for a sweet-salty combo Oreo fans will go wild for.
No matter which path you take, this recipe is endlessly flexible and forgiving. So don’t be afraid to experiment—after all, the best desserts are the ones that feel a little personal.
How to Serve Your Oreo Cake
Once your Oreo cake is frosted and beautifully garnished, the next big question is: How should you serve it? Whether you’re planning a birthday bash, a family dinner, or just treating yourself (because why not?), here are some fun, practical ideas to make your presentation just as delightful as the taste.
For Special Occasions
- Birthday Hero: Add colorful sprinkles on top of the frosting or insert a few birthday candles between the Oreos for a fun, festive vibe.
- Holiday Dessert Table: Drizzle with chocolate ganache and garnish with crushed red-and-green Oreos (yes, those exist!) for a holiday-ready centerpiece.
- Celebration Layer Cake: Want to go all out? Slice the cake in half horizontally to make a three- or four-layer treat with extra frosting between layers. Over-the-top and totally worth it.
Everyday Treats
- With Coffee or Milk: A classic pairing—serve a chilled slice alongside a hot cup of coffee or cold glass of milk. The contrast is chef’s kiss.
- Afternoon Pick-Me-Up: Keep a slice in the fridge for those mid-week moments when only a homemade chocolate cake with Oreos will do.
Serve It Cold for a Twist
- Refrigerate the frosted cake for a few hours before slicing—it firms up just enough for perfect clean cuts and an almost ice-cream cake texture that’s ideal for summer days.
Garnish Ideas
- Extra crushed Oreo cookies sprinkled on top or around the base
- A drizzle of chocolate syrup or ganache for drama
- Mini Oreos for decoration (especially fun on cupcakes!)
- Whipped cream dollops and chocolate curls for an elegant finish
Whether you serve it fancy on a cake stand or on a napkin straight from the fridge, this Oreo cake is guaranteed to steal the show—and a few hearts along the way.
Final Thoughts
And just like that, you’ve mastered an easy Oreo cake recipe that looks bakery‑worthy yet feels wonderfully homemade. From its ultra‑moist chocolate crumb to the playful crunch of crushed cookies, every bite delivers that signature cookies‑and‑cream flavor we all secretly crave.
Keep this homemade Oreo cake in your back pocket for birthdays, potlucks, or those “just because” moments when only a decadent treat will do. After all, nothing beats the joy of slicing into a cake you made from scratch and watching friends’ eyes widen in delight.
Craving more irresistible desserts? Don’t miss this indulgent White Chocolate Cheesecake for another show-stopping option that’s just as easy to love.
Give it a try, share a photo, and let me know how it turned out—your tips might inspire the next baker in our community. Happy baking, and here’s to many more sweet victories in your kitchen!
Oreo Cake
Ingredients
Dry Ingredients:
- 1¾ cups all-purpose flour
- ¾ cup unsweetened cocoa powder
- 1½ teaspoons baking powder
- 1½ teaspoons baking soda
- ½ teaspoon salt
- 1½ cups granulated sugar
- 1½ cups roughly crushed Oreo cookies
Wet Ingredients:
- 2 large eggs
- ¾ cup whole milk
- ½ cup vegetable oil
- 2 teaspoons pure vanilla extract
- 1 cup boiling water
Frosting and Toppings:
- 1½ cups heavy whipping cream or whipped cream
- ½ cup powdered sugar
- 8 ounces softened cream cheese
- Optional: chocolate ganache extra Oreos for garnish
Instructions
Step 1: Preheat the Oven
- Preheat your oven to 175 °C (350 °F). Grease and line two 8-inch round cake pans with parchment paper.
Step 2: Mix the Dry Ingredients
- In a large bowl, whisk together the flour, cocoa powder, baking powder, baking soda, salt, sugar, and crushed Oreo cookies.
Step 3: Combine the Wet Ingredients
- In a separate bowl, beat the eggs, milk, vegetable oil, and vanilla extract until smooth and well blended.
Step 4: Combine Wet and Dry Mixtures
- Gradually add the wet mixture to the dry ingredients, stirring gently until just combined.
Step 5: Add Boiling Water
- Slowly pour in the boiling water while stirring. The batter will be thin—this creates a moist cake texture.
Step 6: Divide and Bake
- Pour the batter evenly into the prepared pans. Bake for 30–35 minutes, or until a toothpick inserted into the center comes out with a few moist crumbs.
Step 7: Cool the Cakes
- Let the cakes cool in their pans for 10 minutes, then transfer them to a wire rack to cool completely.
Step 8: Prepare the Frosting
- Beat the cream cheese and powdered sugar until smooth. Add the whipped cream and beat until light and fluffy.
Step 9: Assemble the Cake
- Place one cake layer on a serving plate. Spread frosting evenly on top, add the second layer, then frost the top and sides.
Step 10: Garnish (Optional)
- Finish with a drizzle of chocolate ganache and garnish with extra Oreo cookies, crushed or whole.
Notes
| Nutrient | Amount |
|---|---|
| Calories | 420 kcal |
| Total Fat | 23 g |
| • Saturated Fat | 9 g |
| Carbohydrates | 52 g |
| • Sugar | 35 g |
| • Fiber | 2 g |
| Protein | 7 g |
| Sodium | 350 mg |
| Cholesterol | 55 mg |
FAQs
I’ve gathered some of the most common questions I get about this Oreo cake recipe to help ensure your baking success:
Can I use store‑brand cookies instead of Oreos?
Absolutely. Any chocolate sandwich cookie will work; just make sure the cream filling is similar so you keep that classic cookies‑and‑cream taste.
How long does this Oreo cake stay fresh?
Cover and refrigerate for up to 4 days. The frosting actually helps seal in moisture, so every slice stays soft and delicious.
Can I freeze leftover slices?
Yes! Wrap individual pieces tightly in plastic wrap, then place them in a freezer bag. Freeze for up to 2 months. Thaw overnight in the fridge for best texture.
Can I make this recipe dairy‑free?
Swap the milk for almond or oat milk, use a neutral oil or dairy‑free butter, and frost with coconut whip or a vegan cream cheese alternative. The Oreo cake flavor stays on point!
Can I freeze leftovers?
You bet! Wrap leftover slices in plastic wrap, then aluminum foil or place them in a freezer-safe container. Freeze for up to 3 months and thaw in the refrigerator before enjoying again.
Got another question? Drop it in the comments—I’m here to help you bake with confidence and a smile!