
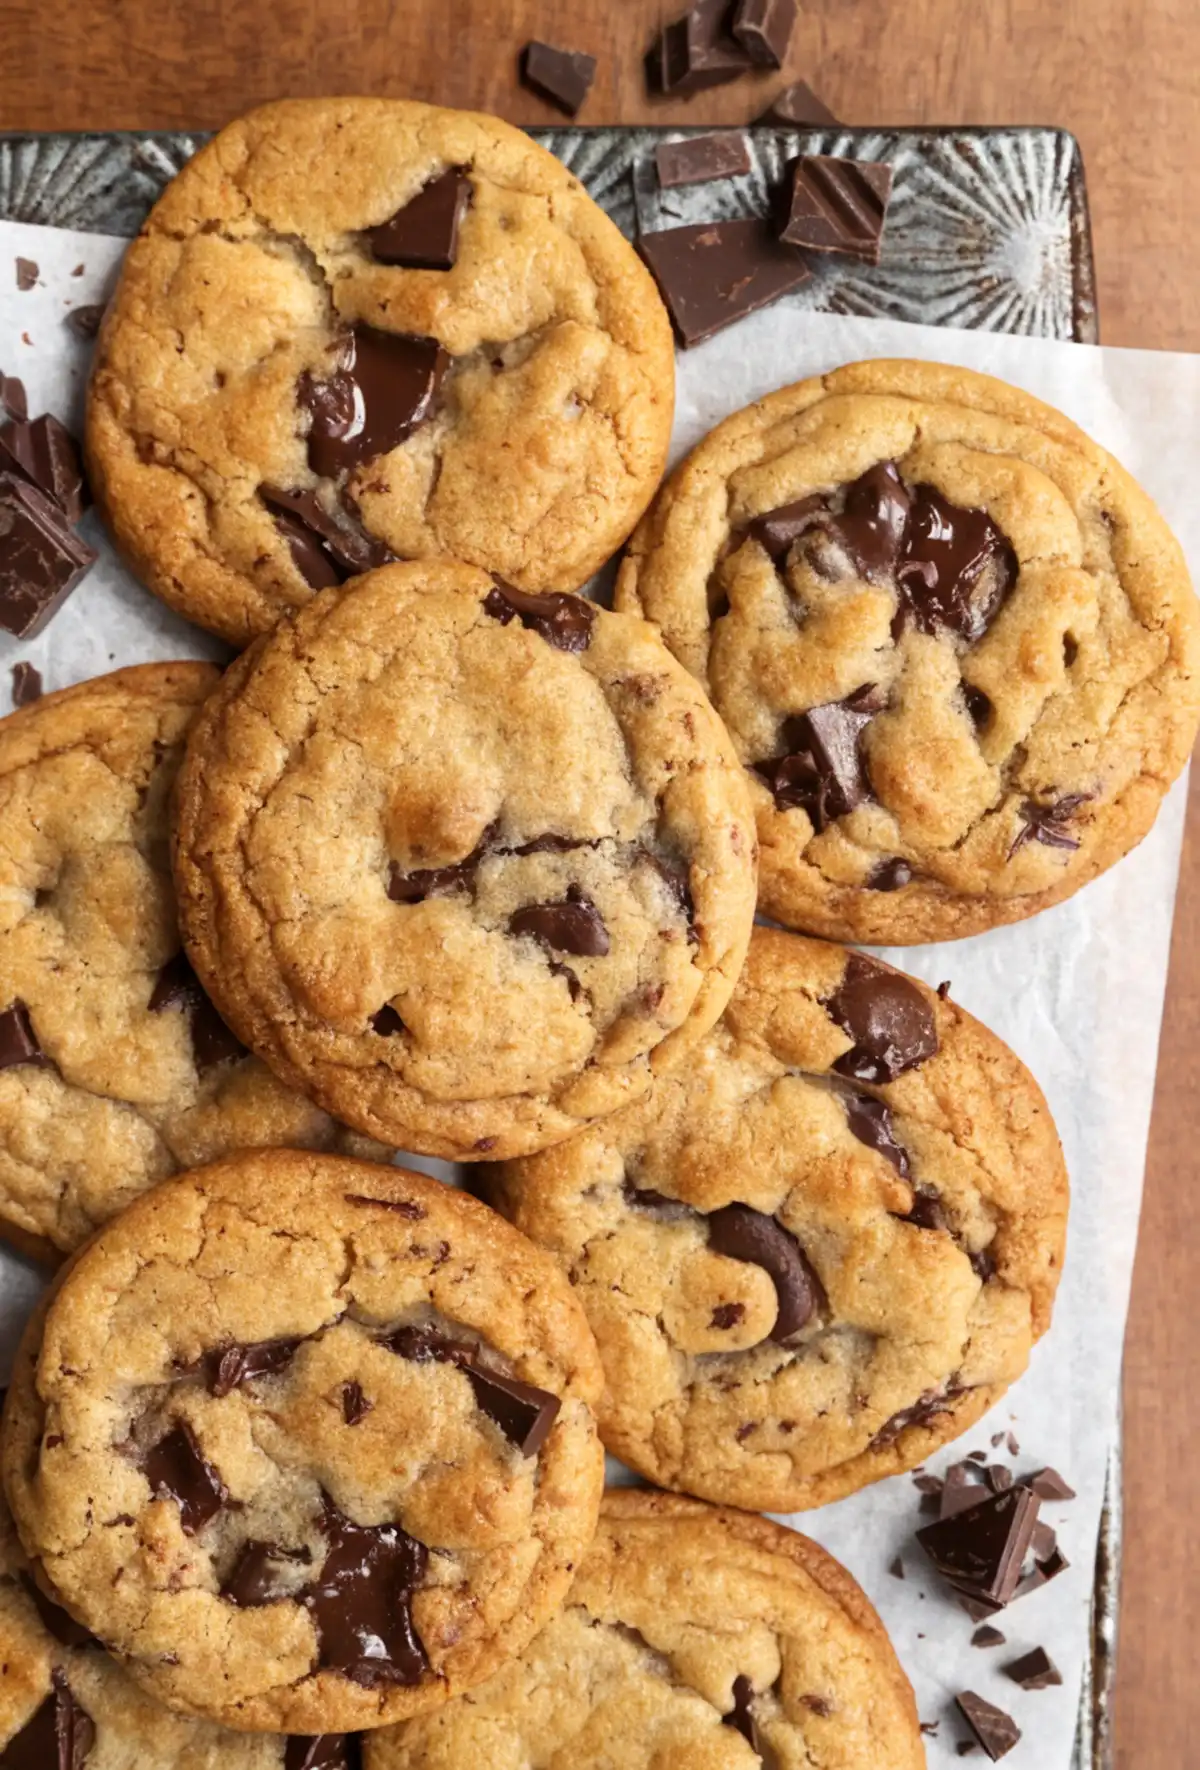
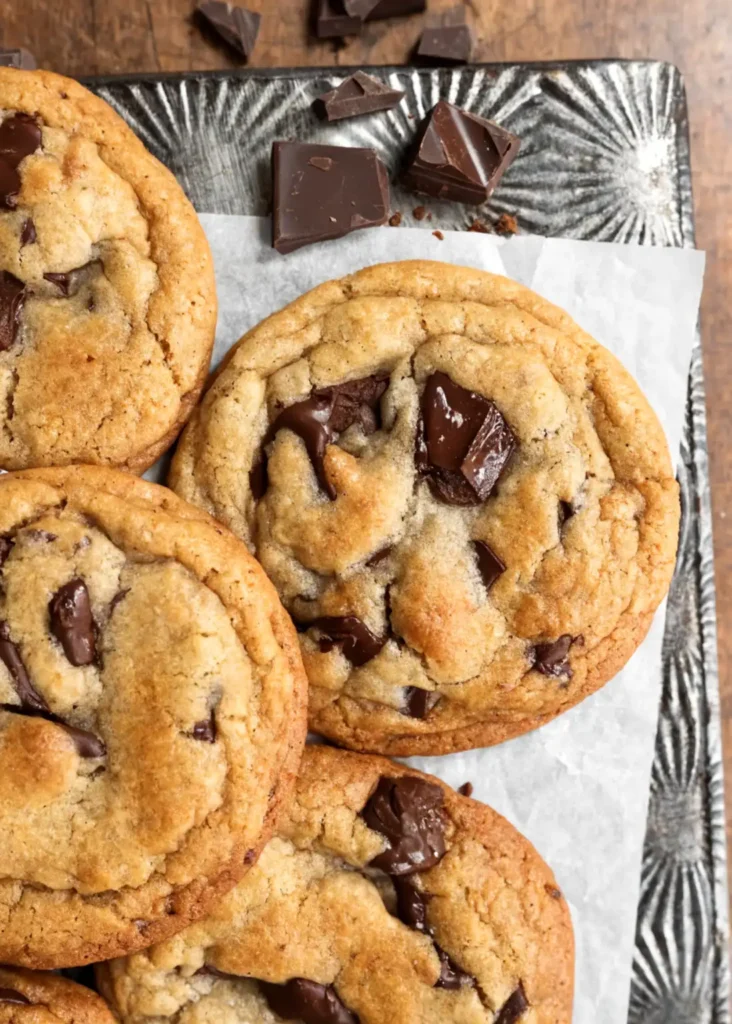
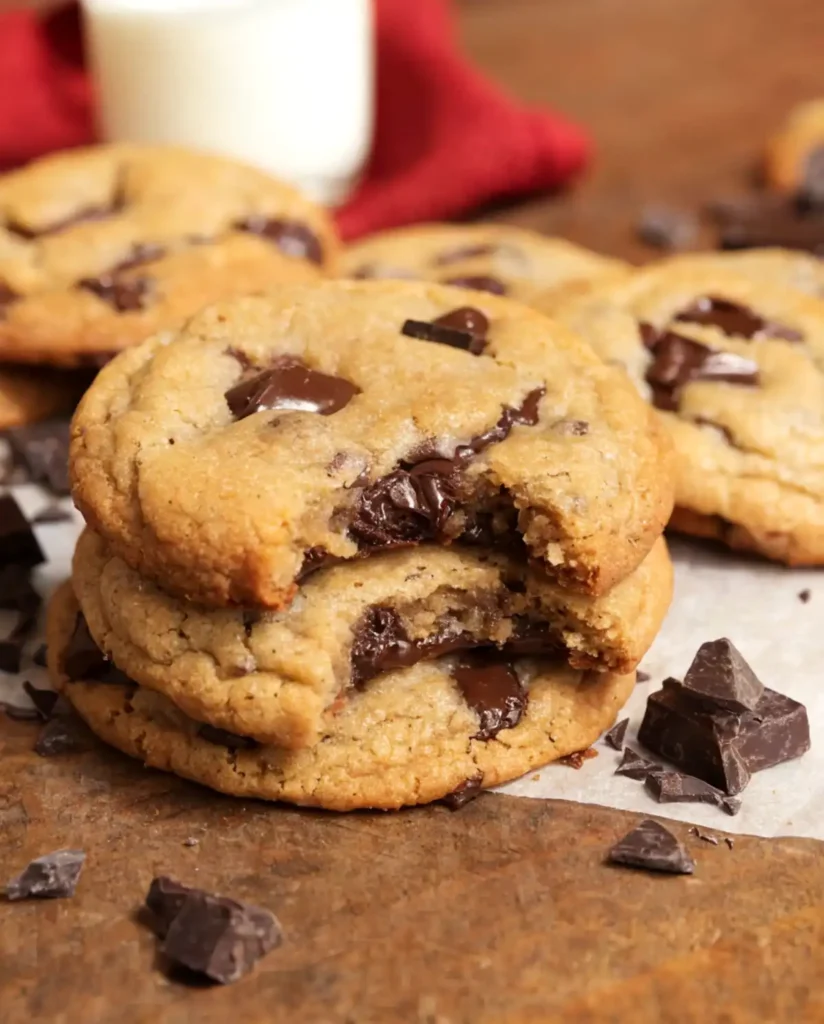
Brown butter chocolate chip cookies change a simple cookie into something richer and deeper in flavor. When butter cooks slowly, the milk solids turn golden and release a warm, nutty smell that feels close to caramel or toasted toffee. I started making cookies this way after testing small tweaks in my own kitchen. One batch with browned butter stood out right away. The flavor felt fuller, and the edges turned crisp while the center stayed soft.
Table of Contents
Why This Recipe Works
The Moisture Factor
Brown butter changes more than flavor. When butter cooks, part of its water evaporates. What remains is mostly butter oil and toasted milk solids. This rich fat gives cookies a deep nutty taste, but it also affects structure. Less water means the dough can spread faster in the oven. Without balance, cookies may turn thin or greasy.
The Milk Secret
A small spoon of milk fixes that moisture loss. One tablespoon replaces the liquid that disappears during browning. This simple step keeps the dough soft and stable. The result is a cookie that stays chewy inside instead of dry or crumbly.
The Baking Soda Advantage
Baking soda plays a key role in texture and color. It raises the dough slightly while keeping the cookie dense and chewy. It also creates a mild alkaline environment that helps the Maillard browning process. This reaction builds deeper color and stronger flavor during baking, giving the cookies rich edges and a golden top.
Ingredients Needed
Use fresh ingredients and measure with care. A kitchen scale gives the most reliable cookie texture, since small flour changes can affect how the dough spreads.
Dry Ingredients
• 1 ½ cups (215 g) all purpose flour
Measure carefully for proper structure. Too little flour can cause cookies to spread too much.
• ¾ teaspoon baking soda
Helps the cookies rise slightly and creates the deep golden color during baking.
• ¼ teaspoon salt
Balances the sweetness and strengthens the overall flavor.
Butter and Sugars
• 10 tablespoons (140 g) salted butter
This butter will be browned first to create a nutty aroma and deeper taste.
• ⅔ cup (145 g) packed light brown sugar
Adds moisture and gives the cookies their chewy texture.
• ⅓ cup (65 g) granulated sugar
Helps form crisp edges and a light crackly surface.
Wet Ingredients
• 1 large egg at room temperature
Room temperature eggs blend more smoothly into the dough.
• 1 tablespoon (15 ml) milk
Replaces the small amount of moisture lost when the butter is browned.
• 1 teaspoon (5 ml) pure vanilla extract
Adds warmth and depth to the cookie flavor.
Chocolate
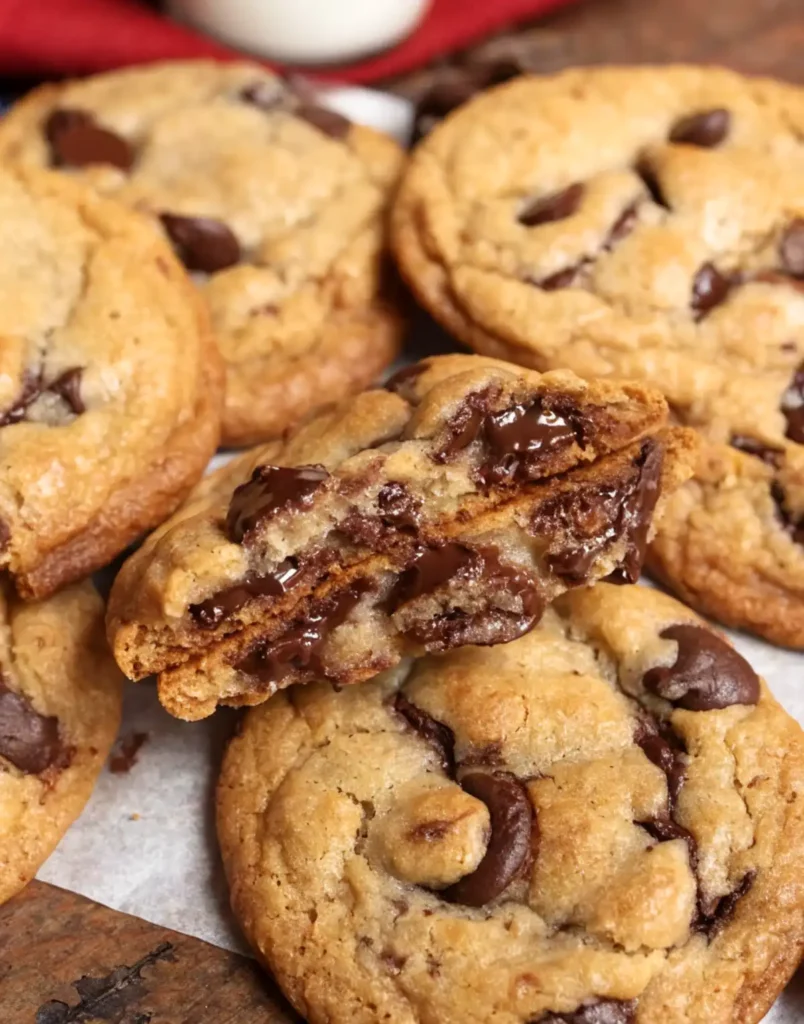
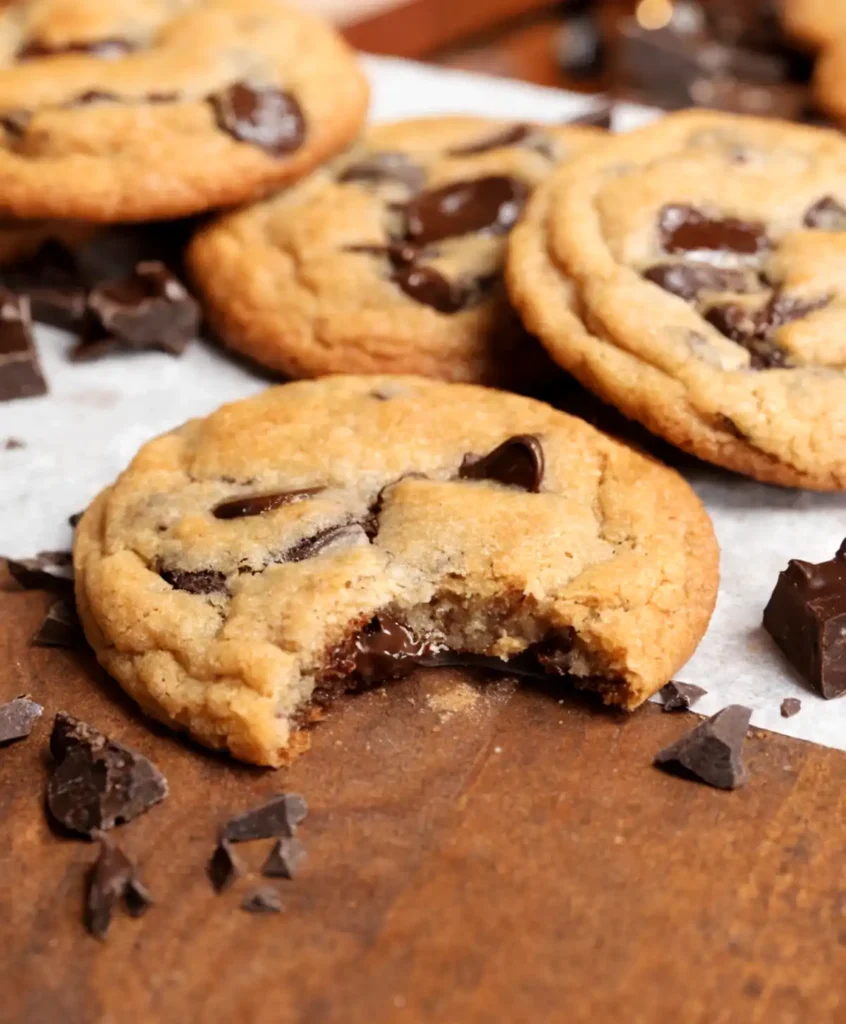
• 3 oz (85 g) dark chocolate, chopped into chunks
Large pieces create soft chocolate puddles inside the cookies. Add a few extra pieces for topping if desired.
• ½ cup (85 g) semisweet chocolate chips
Adds balanced sweetness and steady chocolate flavor throughout the dough.
Optional Finish
• Flaky sea salt
A small sprinkle on top after baking sharpens the chocolate flavor and balances sweetness.
How to Make Brown Butter Chocolate Chip Cookies
Follow these steps carefully for cookies with crisp edges, soft centers, and rich chocolate pools. Plan a short chilling time before baking because the dough needs time to rest.
1. Brown the Butter
Place the butter in a small stainless steel saucepan over medium heat. Let it melt fully, then continue cooking while stirring often. After several minutes the butter will begin to foam and make gentle popping sounds. Watch closely as small brown specks form at the bottom and the foam turns deep golden. The smell will shift to a warm nutty scent. This usually takes 8 to 10 minutes.
Pour the browned butter into a large mixing bowl right away so it does not burn. Let it cool for about 20 to 30 minutes. The butter should feel just slightly warm, close to room temperature, about 32 to 34°C or 90 to 93°F.
2. Mix the Dry Ingredients
In a medium bowl whisk together the flour, baking soda, and salt. Whisking spreads the baking soda evenly through the flour so the cookies bake with even color and texture.
3. Combine Butter and Sugars
Add the brown sugar and granulated sugar to the cooled brown butter. Mix with a spatula until the mixture becomes thick and slightly grainy, similar to wet sand. Gentle mixing works well here because the dough does not need a lot of air.
4. Add the Egg and Flavorings
Add the egg, milk, and vanilla extract. Stir slowly until the mixture becomes smooth and creamy. Avoid beating the mixture hard. Gentle mixing keeps the dough soft and prevents the butter fat from firming up too quickly.
5. Add the Flour Mixture
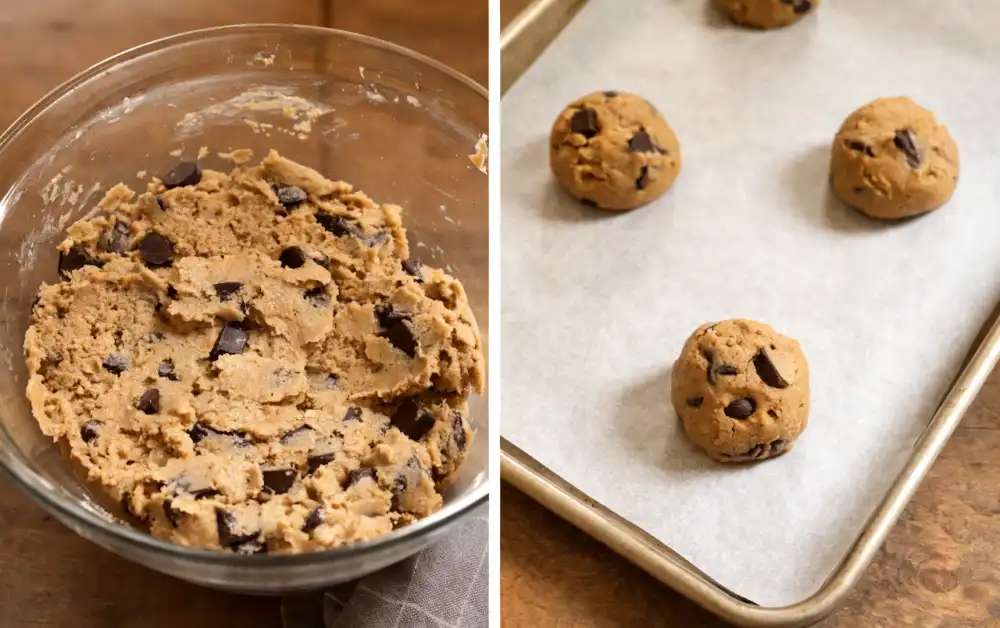
Add the flour mixture to the bowl. Fold it into the dough slowly. When most of the flour has blended in, add the chopped chocolate and chocolate chips. Continue mixing just until the dough comes together and the chocolate spreads evenly.
6. Chill the Dough
Cover the bowl and place it in the refrigerator for 1 to 4 hours. Chilling allows the flour to absorb moisture and helps the dough firm up. This step improves flavor and keeps the cookies from spreading too much during baking.
7. Prepare for Baking
Heat the oven to 375°F or 190°C. Line two large baking sheets with parchment paper.
8. Shape the Dough
Use a cookie scoop to divide the dough into about 14 portions, roughly 2 ounces or 56 grams each. Roll each portion into a smooth ball. Place them on the baking sheets with about 3 inches of space between them. Press a few extra chocolate pieces on top if desired.
9. Bake the Cookies
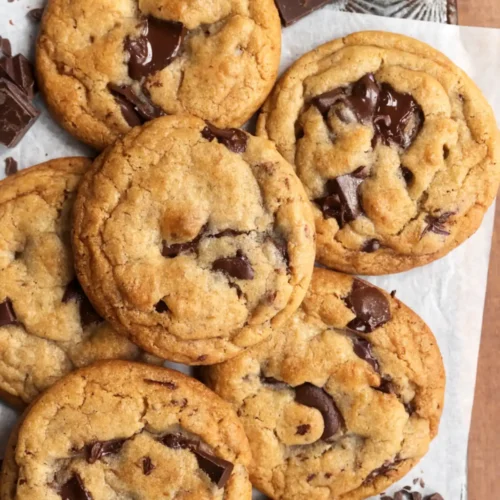
Bake for 8 to 10 minutes. The tops should turn golden while the edges become deeper brown. The centers will still look slightly soft, which keeps the cookies chewy once cooled.
10. Cool and Finish
Let the cookies rest on the baking sheet for about 2 minutes. Then move them carefully to a wire rack to cool completely. Sprinkle a small pinch of flaky sea salt on top if you like a sweet and salty finish.
The Mixing and Baking Process
Gentle Mixing
This dough works best with gentle mixing. A spatula gives better control than a strong electric mixer. Stirring slowly keeps the butter fat stable and prevents the dough from becoming dense. Overmixing can also build too much gluten in the flour, which may lead to tough cookies. Hand mixing keeps the texture soft and helps the dough stay smooth and thick.
The Chill Time
Refrigerating the dough for about 1 to 4 hours improves both texture and flavor. During this time the flour absorbs the liquid from the butter, egg, and milk. The dough also becomes firmer as the fat cools. This step helps control spreading in the oven and gives the cookies a richer taste after baking.
High Heat Baking
Baking at 375°F or 190°C creates the perfect balance between crisp edges and soft centers. The higher heat sets the outer layer of the cookie quickly while the inside stays tender. As the cookies bake, the edges turn golden brown while the middle remains slightly soft, giving that classic chewy cookie texture.
Expert Troubleshooting
My Cookies Spread Too Much
Several small factors can cause cookies to spread more than expected. First check the butter temperature. If the brown butter was still hot when mixed with the sugars, the dough may become too loose. Another common reason is flour measurement. If the flour was scooped without measuring carefully, the dough may not have enough structure. Also check the egg size. An extra large egg adds more liquid, which can lead to thinner cookies.
My Cookies Are Too Thick or Puffy
If the cookies rise too much and stay thick, the amount of baking soda may be the cause. Try reducing it slightly from ¾ teaspoon to ½ teaspoon. This change lowers the lift during baking and allows the cookies to settle into a denser texture with crisp edges.
My Dough Is Crumbly
Crumbly dough often happens when the brown butter cools too long in the refrigerator. When the fat becomes very cold, it forms firm crystals that make mixing harder. Let the dough sit at room temperature for a few minutes and mix gently again. The dough should return to a smooth and soft consistency.
Storage and Freezing Instructions
Room Temperature Storage
After the cookies cool completely, place them in an airtight container. Store them at room temperature for up to 3 days. Keep the container sealed well so the cookies stay soft and chewy. If stacking the cookies, place a small sheet of parchment paper between layers to prevent sticking.
Freezing Cookie Dough
This dough freezes very well and allows fresh cookies anytime. Shape the dough into balls as described in the recipe. Place the dough balls on a tray and freeze until firm. Once frozen, transfer them into a sealed freezer bag or airtight container.
Baking from Frozen
You can bake the dough directly from the freezer. Place the frozen dough balls on a lined baking sheet and bake at the same temperature. Add about 1 to 2 extra minutes to the baking time. The cookies will still develop crisp edges with a soft center.
Conclusion
These brown butter chocolate chip cookies stand out because they combine deep butter flavor with a soft, chewy center and crisp golden edges. Browning the butter adds a rich, nutty taste that simple melted butter cannot match. A small splash of milk restores moisture, while the right oven temperature helps the cookies bake evenly with gooey chocolate pockets in every bite.
The method stays simple but the result feels bakery quality. With careful measuring, gentle mixing, and a short chill in the fridge, you get cookies that taste rich and balanced every time.
If you tried this recipe, leave a comment and a star rating to share your results. Your feedback helps other readers know what to expect. You can also share your cookie photos on Pinterest or Facebook so others can see your batch.
Did you add extra chocolate chunks or finish them with flaky sea salt? Tell us what twist you tried. Your idea might inspire the next baker in the kitchen.
YOU MIGHT ALSO LIKE…
Brown Butter Chocolate Chip Cookies
Ingredients
Dry Ingredients
- 1 ½ cups all purpose flour measured carefully
- ¾ teaspoon baking soda
- ¼ teaspoon salt
Butter and Sugars
- 10 tablespoons salted butter to be browned
- ⅔ cup packed light brown sugar
- ⅓ cup granulated sugar
Wet Ingredients
- 1 large egg room temperature
- 1 tablespoon milk
- 1 teaspoon pure vanilla extract
Chocolate
- 3 oz dark chocolate chopped into chunks
- ½ cup semisweet chocolate chips
Optional Finish
- flaky sea salt for sprinkling after baking
Instructions
- Place the butter in a small saucepan over medium heat. Melt completely, then cook while stirring often until the butter foams and brown specks form at the bottom with a nutty aroma, about 8–10 minutes. Immediately pour into a large bowl and cool for 20–30 minutes until slightly warm.
- In a medium bowl whisk together the flour, baking soda, and salt until evenly combined.
- Add the brown sugar and granulated sugar to the cooled brown butter. Mix with a spatula until thick and slightly grainy.
- Add the egg, milk, and vanilla extract. Stir gently until the mixture becomes smooth and creamy.
- Add the flour mixture to the bowl and fold slowly until almost combined.
- Add the chopped chocolate and chocolate chips. Continue mixing just until the dough comes together and the chocolate is evenly distributed.
- Cover the bowl and refrigerate the dough for 1 to 4 hours to allow the flour to absorb moisture and help control spreading.
- Preheat the oven to 375°F (190°C) and line two baking sheets with parchment paper.
- Scoop the dough into about 14 portions (around 2 oz or 56 g each). Roll into smooth balls and place them on the baking sheets about 3 inches apart. Add extra chocolate pieces on top if desired.
- Bake for 8–10 minutes until the edges are deep golden and the centers look slightly soft. Let the cookies rest on the baking sheet for 2 minutes before transferring to a wire rack. Sprinkle with flaky sea salt if desired.
Notes
Nutrition Facts (Per Serving)
| Nutrient | Amount |
| Calories | 210 kcal |
| Total Fat | 11 g |
| Saturated Fat | 6 g |
| Carbohydrates | 27 g |
| Sugar | 17 g |
| Protein | 2.5 g |
| Fiber | 1 g |
| Sodium | 120 mg |
| Cholesterol | 30 mg |
FAQs
What is brown butter, and how does it change the flavor and texture of cookies?
Brown butter is butter that cooks until the milk solids turn golden brown. During this process, the butter releases a nutty smell and deeper flavor that feels close to toasted toffee. In cookies, this step adds richer taste and a slightly crisp edge while keeping the inside soft and chewy.
What are the visual and auditory signs of perfectly browned butter?
You will notice several clear stages. First the butter melts and begins to bubble. After a few minutes the bubbles grow stronger and the butter makes soft popping sounds. Then a thick golden foam forms on the surface. Brown specks appear at the bottom of the pan and the smell turns warm and nutty. At this point the butter is ready and should be removed from heat.
How much volume is lost when browning butter, and do I need to replace it?
When butter browns, some of its water evaporates during cooking. This means the final butter contains more fat and less liquid. To balance this change, adding one tablespoon of milk restores part of the lost moisture. This step helps the cookies stay soft and chewy.
How cool does the brown butter need to be before mixing the dough?
The butter should cool until it feels slightly warm but not hot. A good target range is about 32 to 34°C or 90 to 93°F. If the butter is too hot, it may melt the sugars and create greasy dough. If it becomes too cold, the fat may firm up and make mixing harder.
Why did my brown butter cookies spread too much or turn out greasy?
This issue often happens when the butter was still too warm during mixing. Another common reason is not measuring the flour with care. Too little flour reduces structure in the dough. A larger egg can also add extra liquid. Chilling the dough before baking helps control spreading and improves texture.
What temperature and how long should I bake brown butter cookies for the best results?
Bake the cookies at 375°F or 190°C for about 8 to 10 minutes. This temperature allows the edges to set quickly while the center stays soft. The cookies should look golden on top with deeper brown edges and a slightly soft middle when removed from the oven. They will continue to firm up as they cool.