
There’s nothing quite like the deep, comforting aroma of homemade broth simmering on the stove. Have you ever wondered how to unlock that rich, full-bodied flavor found in restaurant-quality soups? The secret lies in soup bones—nature’s powerhouse for a nutrient-rich, collagen-packed broth that warms the soul and nourishes the body.
With just a few simple ingredients and a little patience, you can create a slow-simmered broth that enhances everything from soups and stews to sauces and gravies. Whether you’re looking to boost your gut health, support joint function, or simply enjoy a heartwarming bowl of broth, this recipe will guide you through the process with easy-to-follow steps and pro tips.
Table of Contents
Key Benefits of Making Broth with Soup Bones
Making your own broth with soup bones isn’t just about creating a flavorful base for your dishes—it’s about bringing rich, nourishing benefits to your kitchen. Here’s why you should consider adding this homemade broth to your cooking routine:
- Nutrient-Rich and Collagen-Packed: The slow simmering process extracts collagen, a protein that supports joint health, improves skin elasticity, and promotes gut health.
- Boosts Immunity: The minerals released from the bones—like calcium, magnesium, and phosphorus—help support a strong immune system and overall health.
- Deep, Complex Flavor: Homemade broth has a depth of flavor that store-bought versions simply can’t match. The slow-simmering technique allows all the goodness to infuse into the liquid, creating a perfectly balanced, savory taste.
- Endless Versatility: Whether you sip it straight, use it as a base for soups and stews, or incorporate it into sauces, your homemade broth will elevate any recipe. Plus, it’s the perfect way to use leftover bones and reduce waste.
By making broth from soup bones, you’re not just cooking; you’re crafting something that brings both flavor and health benefits to your meals, making it well worth the time and effort.
Ingredients for a Rich and Flavorful Broth
Before you dive into simmering, let’s gather the essentials for a nutritious bone broth that’s both delicious and easy to make. This recipe is adaptable, so feel free to adjust based on what you have on hand. Here’s what you’ll need:
Main Ingredients:
- Soup Bones (beef, chicken, or a mix of both)—aim for 2-3 pounds for a flavorful broth.
- Water—enough to cover the bones (usually 8-10 cups).
- Apple Cider Vinegar—about 2 tablespoons to help extract minerals from the bones.
- Vegetables—such as 2 carrots, 2 celery stalks, and 1 large onion (roughly chopped).
- Garlic—4-5 cloves, smashed. Garlic imparts a fragrant richness and is packed with health benefits.
- Herbs—fresh or dried thyme, bay leaves, and parsley stems (about 2-3 sprigs of each).
- Salt & Pepper—to taste. Start with a pinch of salt and adjust as you go.
Optional Add-ins:
- Leeks—for an extra layer of flavor.
- Ginger—for a hint of warmth and digestive benefits.
- Tomatoes—to introduce a touch of acidity and umami.
These ingredients will come together to create a slow-simmered broth that’s collagen-rich and packed with natural goodness. Now, let’s move on to the cooking process to transform these simple ingredients into a flavorful and health-boosting broth!
Instructions for Making Broth with Soup Bones
Now that we have our ingredients ready, it’s time to turn those soup bones into a rich, nutrient-packed broth. The process may take some time, but trust me, the result is absolutely worth it. Here’s a step-by-step guide to help you along the way:
Step 1: Roasting the Bones (Optional, but Recommended)
Roasting the soup bones before simmering brings out a deeper, richer flavor. Here’s how to do it:
- Preheat your oven to 400°F (200°C).
- Place your bones on a baking sheet and roast them for about 30-40 minutes, turning halfway through.
- The bones should be golden-brown and slightly caramelized. This step adds an extra layer of umami to your broth.
Step 2: Prepare the Vegetables and Aromatics
While the bones roast, chop up your vegetables. Rough chopping is fine, as we’ll be straining everything later:
- Carrots, celery, onion, and garlic can all be tossed into the pot as whole pieces.
- Add your herbs (thyme, bay leaves, parsley stems) and a pinch of salt for seasoning.
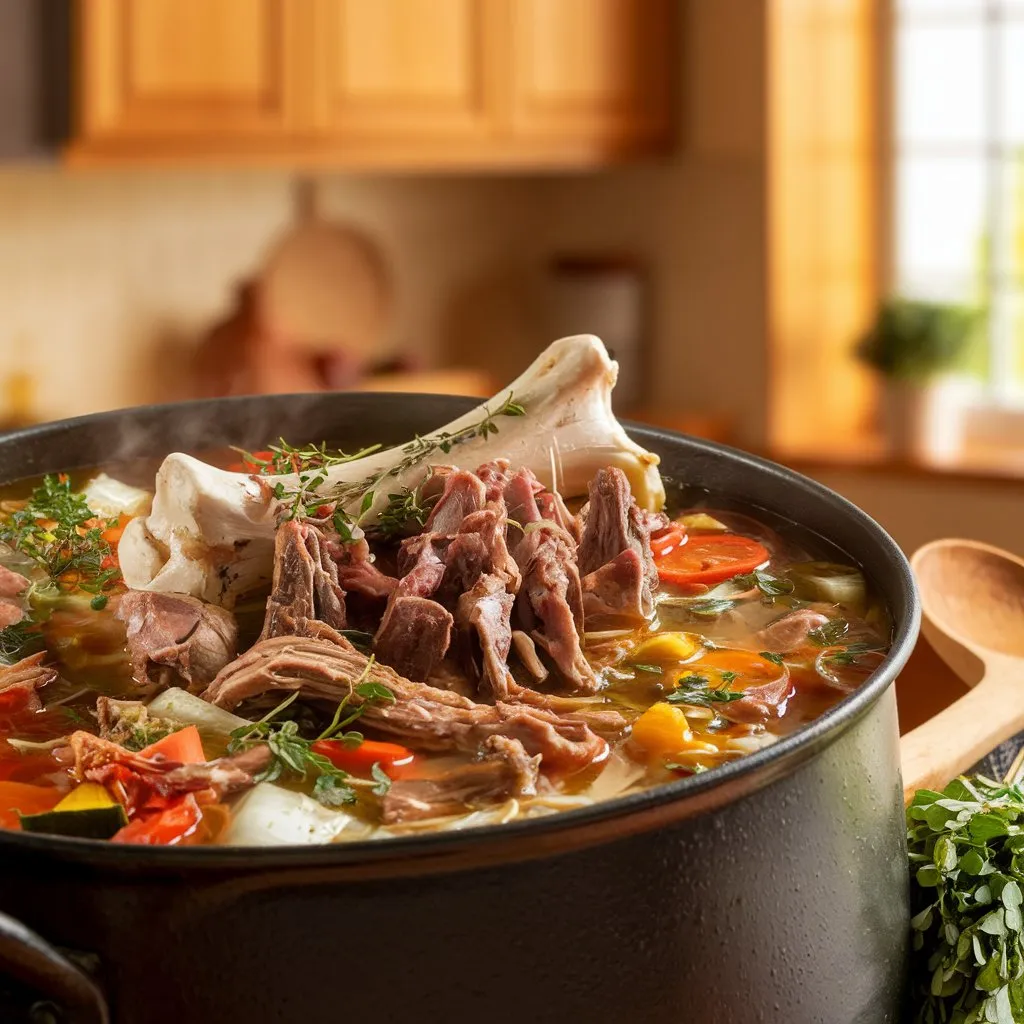
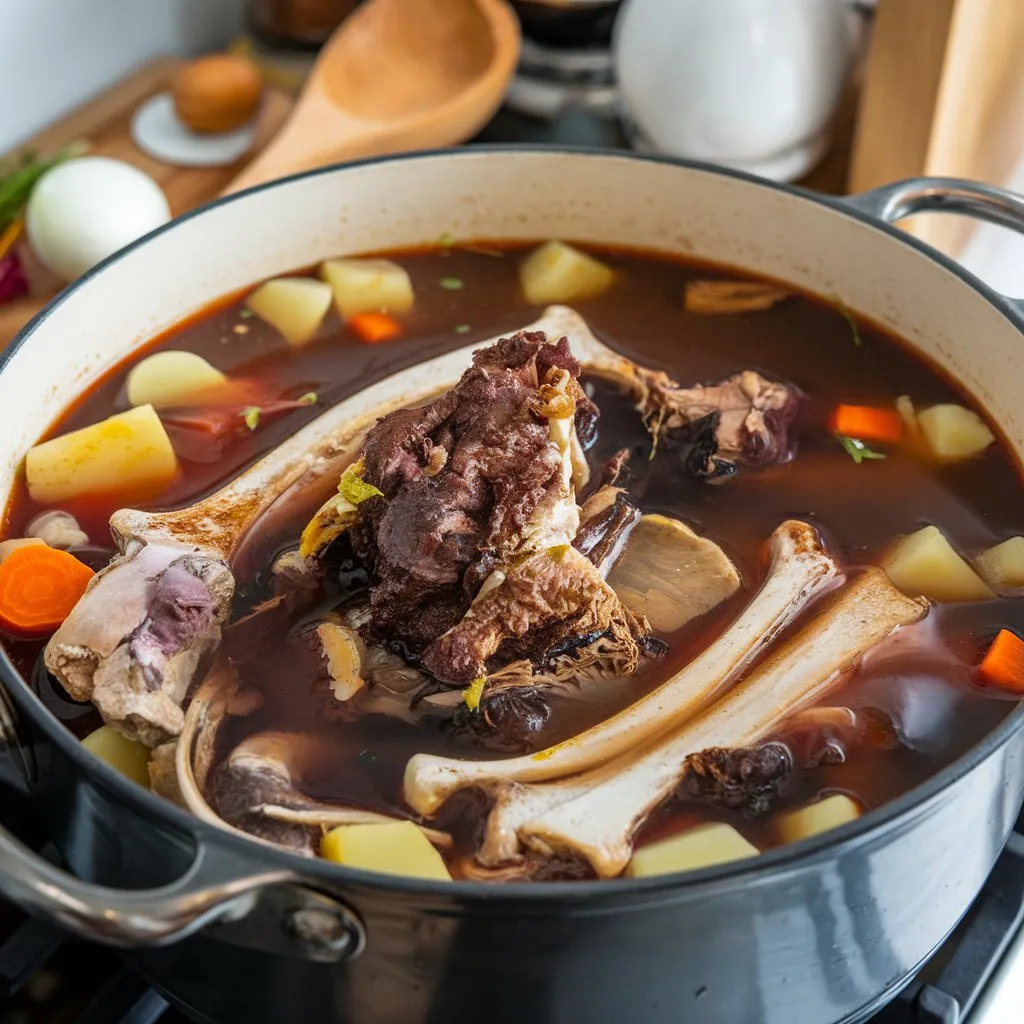
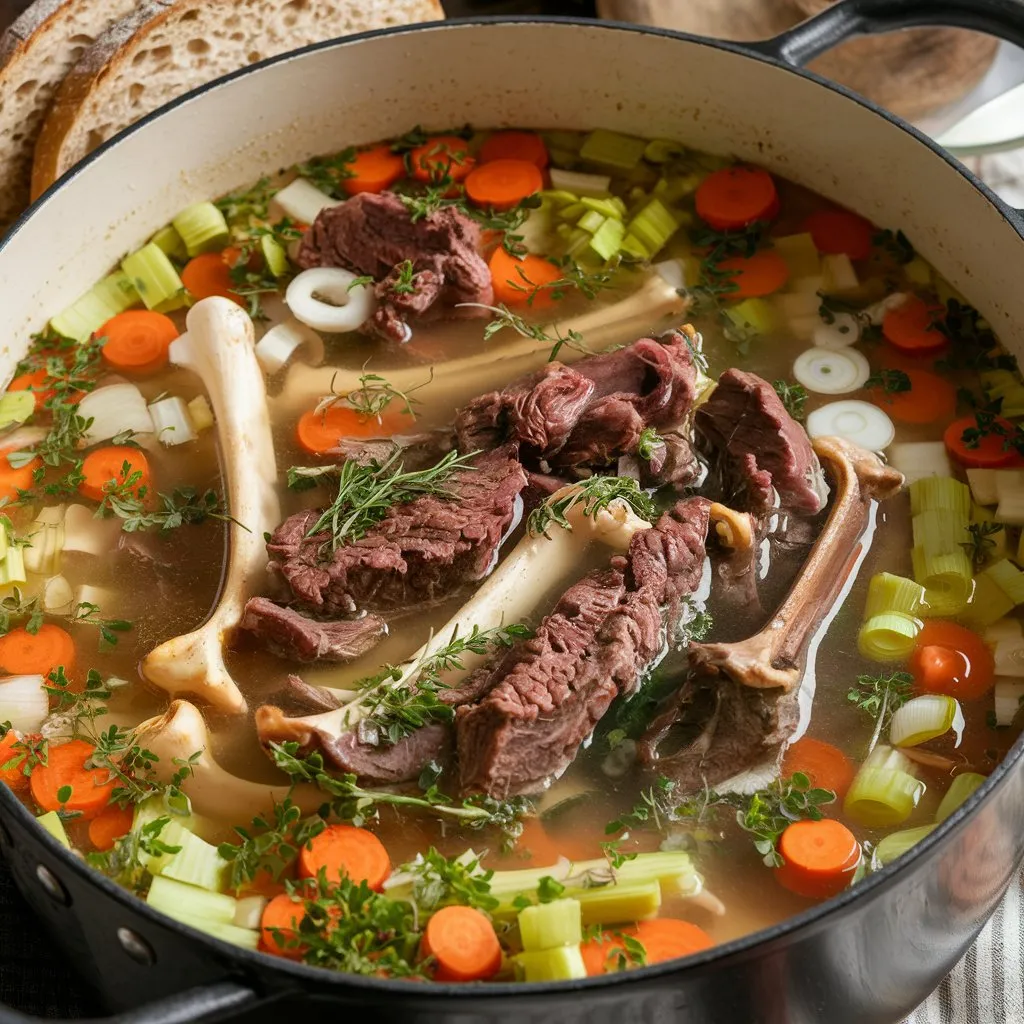
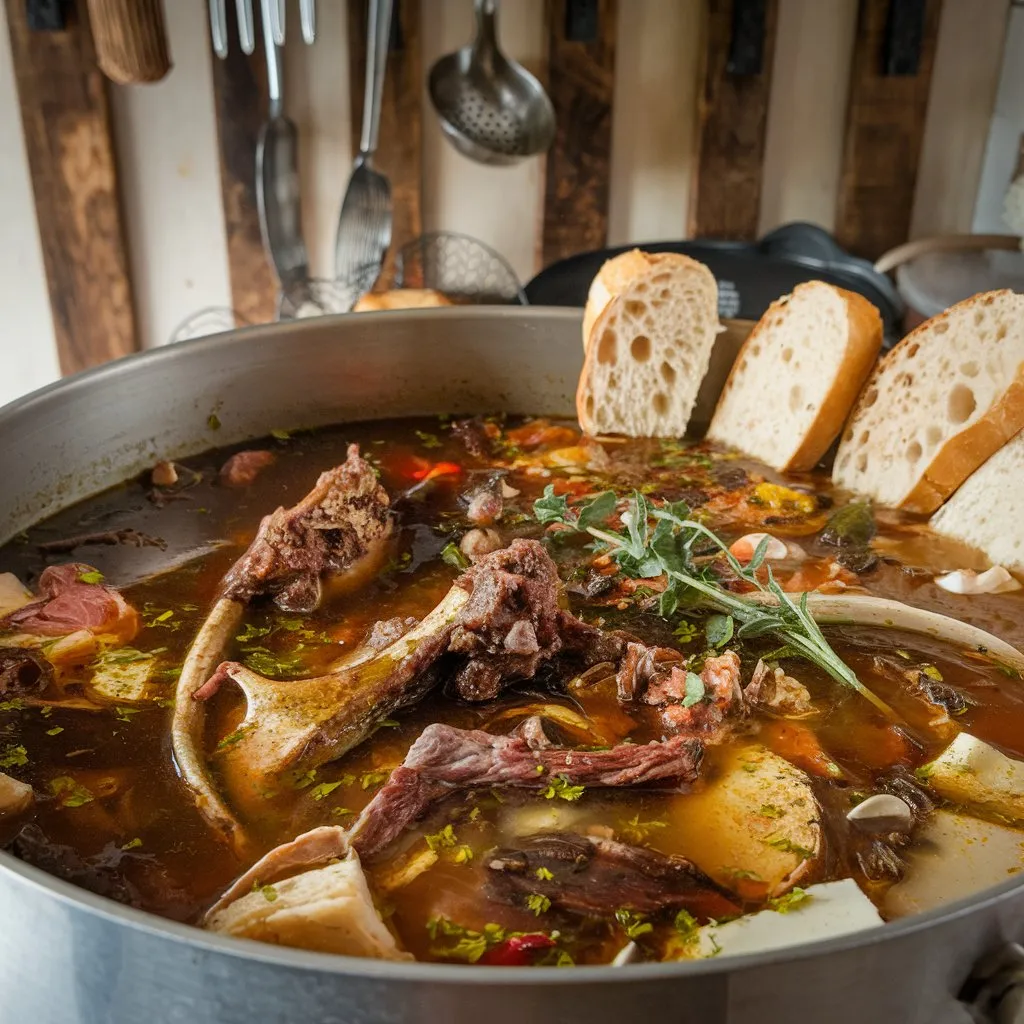
Step 3: Simmering the Broth
Once your bones are roasted, it’s time to start simmering:
- Add the roasted bones to a large stockpot (or slow cooker if you prefer).
- Pour in 8-10 cups of water, covering the bones completely.
- Stir in apple cider vinegar—this helps draw out the minerals and collagen from the bones during the cooking process.
- Bring everything to a gentle boil over medium heat, then reduce to a low simmer.
- Simmer for 12-24 hours, occasionally skimming any foam or impurities that rise to the surface. The longer you simmer, the richer the flavor and more collagen you’ll extract.
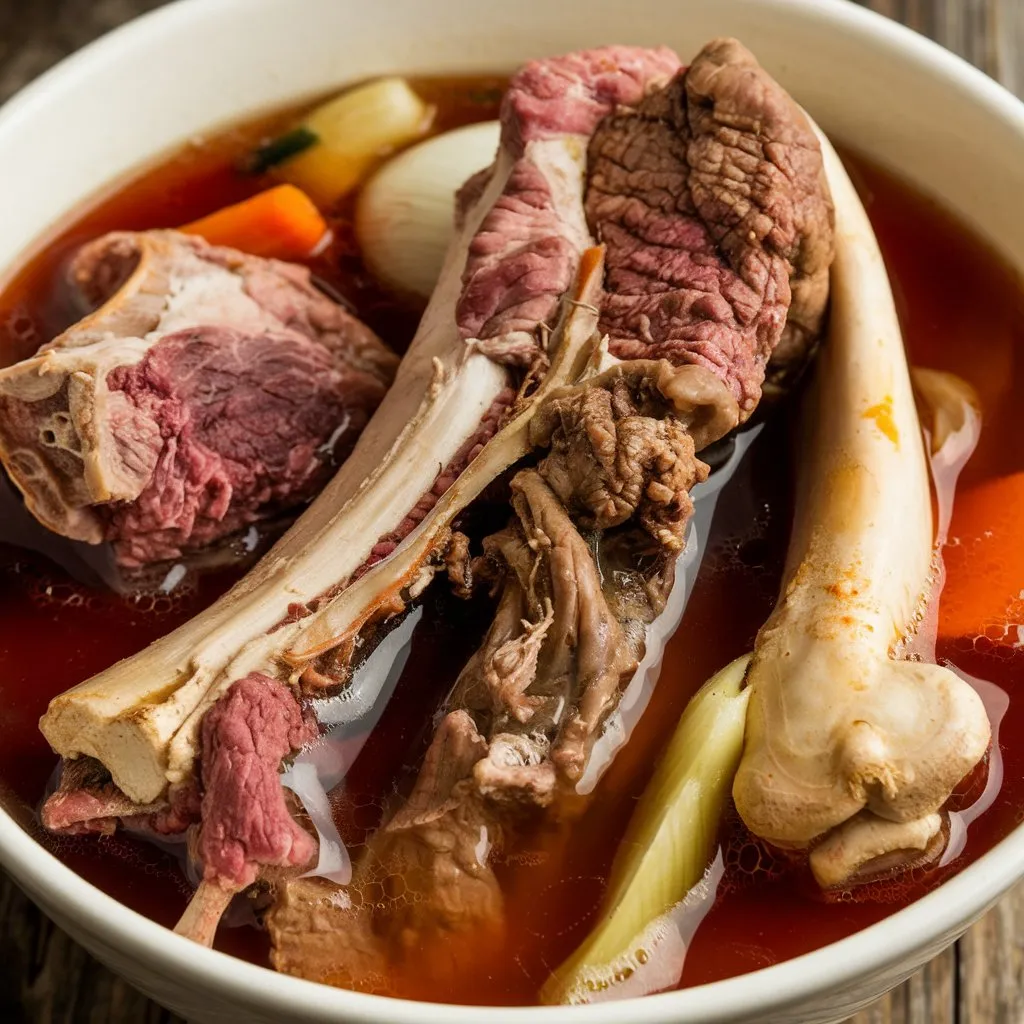
Step 4: Straining and Storing
After the simmering process, you’ll want to strain the broth to remove any bone fragments and vegetable bits:
- Carefully strain the broth through a fine mesh strainer into another pot or large bowl.
- Discard the bones and vegetables (they’ve given all their flavor to the broth!).
- Let the broth cool to room temperature, then refrigerate. As it cools, you’ll notice a gelatinous consistency, which is the collagen setting—this is a good sign!
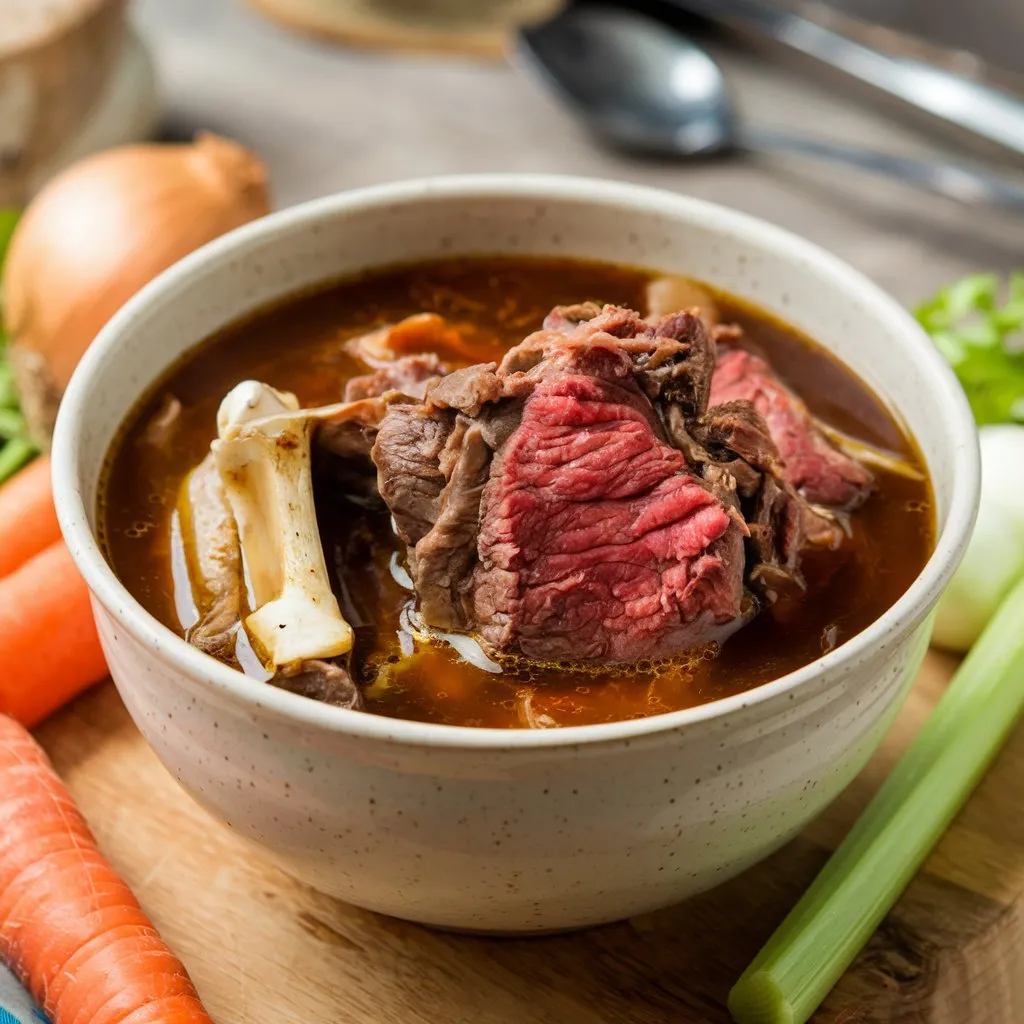
Step 5: Enjoying Your Broth
Once your broth has cooled and set, it’s ready to be used. You can either store it in jars in the fridge for up to 1 week, or freeze it for longer storage.
Pro Tip: If you like a more intense flavor, you can reduce the broth by simmering it further, concentrating the taste even more.With just these simple steps, you’ve turned soup bones into a delicious, healthy broth that’s perfect for sipping or adding depth to any dish.
Pro Tips and Variations for Your Broth
Making broth with soup bones is an art that gets even better with time and a few expert tips. Whether you’re a seasoned cook or a beginner, these pro tips and variations will help you take your broth to the next level.
Pro Tips for the Best Broth
- Don’t rush the simmer: Slow and steady is key to extracting maximum flavor and nutrients from the bones. The longer you simmer, the richer and more collagen-packed your broth will be. Aim for at least 12 hours if you can, and up to 24 hours for an ultra-rich result.
- Skim the surface: During the first few hours of simmering, you may notice foam or impurities floating on the top. Skim these off with a spoon to keep the broth clear and clean.
- Use a slow cooker for convenience: If you don’t have the time to monitor the simmer, consider using a slow cooker on low heat for 12-24 hours. It’s a hands-off method that gives you the same great results.
- Make it extra flavorful: Add a splash of soy sauce or fish sauce for added depth. A few dried mushrooms or a couple of tomatoes can also bring a nice umami kick.
- Strain well: After simmering, make sure you strain the broth well to avoid any bone fragments or vegetable bits. This ensures a smooth, clear broth.
Creative Variations to Try
Once you’ve mastered the basic soup bone broth, feel free to experiment with different flavors and add-ins. Here are some ideas:
- Spicy Broth: Add a few slices of ginger, a couple of dried chilies, or a pinch of cayenne pepper for a warming, spicy twist.
- Herb-Infused Broth: Play around with fresh herbs like rosemary or oregano for a more fragrant broth. These herbs will give your broth a delightful earthiness.
- Roasted Veggie Broth: For an even richer flavor, try roasting the vegetables (carrots, onions, garlic, etc.) in the oven before adding them to the pot. This adds a caramelized depth to your broth.
- Bone Mix: Don’t limit yourself to just one type of bone. Try mixing beef and chicken bones for a more complex, layered flavor.
Storing Your Broth
Once your broth is ready, you can store it in a few different ways:
- In the fridge: Let it cool to room temperature before storing it in an airtight container in the fridge for up to 1 week.
- In the freezer: For longer storage, freeze the broth in ice cube trays for easy portioning, or store it in large containers for future use. It keeps for up to 3 months in the freezer.
With these tips and variations, you’re equipped to create flavor-packed broth every time! Whether you’re sipping it on its own or using it as a base for other dishes, your homemade broth will be a hit in any recipe.
How to Serve Your Broth
Now that you’ve made your delicious homemade broth, it’s time to enjoy it! There are countless ways to serve soup bone broth, whether as a comforting drink or the base for an amazing meal. Here are some ideas to help you get started:
1. Classic Broth as a Comforting Drink
- Sipping on broth is one of the simplest and most comforting ways to enjoy the fruits of your labor. Pour it into a mug, and enjoy it hot. You can garnish with a little fresh parsley, a squeeze of lemon juice, or even a splash of soy sauce for extra flavor.
- If you’re craving a nourishing snack or a meal starter, this is an excellent choice—especially on cold days!
2. As a Soup Base
- Use your soup bone broth as a rich base for soups and stews. You can create a variety of vegetable, chicken, or beef soups with it. Simply add your favorite veggies, proteins, and spices to the broth, and let it simmer for a while to infuse the flavors.
- For a heartier meal, try adding noodles, rice, or potatoes to make a filling, flavorful soup. Chicken noodle soup or beef stew made with this broth will be a family favorite.
3. In Risottos and Sauces
- Risotto made with bone broth takes on a deeper, more complex flavor. Swap out the regular chicken stock for your homemade broth in any risotto recipe to elevate it.
- You can also use the broth as the base for gravies or sauces. Whether you’re making a beef gravy or a savory sauce for pasta, the richness of your broth will add a delicious depth.
4. For Cooking Grains and Legumes
- Try cooking grains like quinoa, barley, or rice in your broth instead of water. It infuses them with flavor, making them much more exciting and satisfying.
- Lentils and beans can also benefit from being cooked in your homemade broth, adding a delicious depth of flavor to your dishes.
5. Freezer-Friendly Meal Prep
- If you’ve made a big batch of soup bone broth, don’t forget that it freezes well! You can store the broth in ice cube trays for easy-to-use portions or in large containers for future meals. The best part? It’ll be ready whenever you need a quick, rich base for your next cooking adventure.
6. With Sautéed Veggies or Stir-Fries
- Add a splash of broth to sautéed vegetables or use it to deglaze your pan after cooking stir-fries. It enhances the flavors and adds moisture to the dish, creating a deliciously savory side.
With these serving suggestions, you’re all set to enjoy your homemade soup bone broth in various ways. Whether you’re sipping it as a simple, nourishing drink or using it to elevate a meal, this broth will be a versatile addition to your kitchen repertoire.
Final Thoughts
Making broth with soup bones is easy and incredibly rewarding. The rich, flavorful result enhances dishes like soups, risottos, and more. Follow the steps and pro tips to create a nutritious, flavorful broth that can be enjoyed fresh or frozen for later.
With its deep, complex flavor, this simple dish will become a kitchen staple. So, gather your bones, start simmering, and enjoy the magic of homemade broth! Happy cooking!
For another tasty soup idea, check out our Best Chopped Soup recipe.

Soup Bone Broth
Ingredients
- 2-3 lbs soup bones beef, chicken, or both
- 8-10 cups water
- 2 tbsp apple cider vinegar
- 2 carrots chopped
- 2 celery stalks chopped
- 1 large onion quartered
- 4-5 garlic cloves smashed
- 2-3 sprigs thyme
- 2 bay leaves
- 2-3 sprigs parsley stems
- Salt & pepper to taste
Optional:
- 1 leek chopped
- 1- inch ginger smashed
- 1 tomato chopped
Instructions
Prepare the ingredients:
- Rinse the soup bones under cold water to remove any impurities. Roughly chop the vegetables (carrots, celery, onion, and garlic).
Combine in a pot:
- Add the soup bones, vegetables, garlic, thyme, bay leaves, and parsley stems to a large pot. Pour in enough water to cover the bones (8-10 cups). Add the apple cider vinegar.
Bring to a boil:
- Bring the mixture to a boil over medium-high heat. Once boiling, reduce the heat to low.
Simmer:
- Let the broth simmer gently for 12-24 hours. Skim off any foam or impurities that rise to the surface during the first few hours.
Strain the broth:
- After simmering, strain the broth through a fine mesh strainer to remove the bones, vegetables, and herbs.
Season and serve:
- Season the broth with salt and pepper to taste. Use it immediately or store it in the refrigerator for up to 5 days, or freeze for longer storage.
Notes
- Calories: 50-70 kcal
- Fat: 3-5g
- Saturated Fat: 1-2g
- Protein: 7-9g
- Carbohydrates: 2-4g
- Fiber: 1-2g
- Sugar: 1-2g
- Sodium: 300-400mg (depending on added salt)
- Calcium: 20-40mg (from bones)
- Iron: 1-2mg
FAQs
Can I use bones from any type of meat?
Yes, you can! Beef, chicken and even fish bones work great for making broth. Each type of bone imparts its unique flavor, so feel free to experiment. Beef bones will give you a richer, heartier broth, while chicken bones create a lighter, more delicate base.
Do I need to roast the bones before making broth?
Roasting the bones is optional but highly recommended. Roasting the bones in the oven caramelizes them, which adds a deeper, richer flavor to your broth. If you’re looking for a richer, more savory taste, consider roasting your bones at 400°F (200°C) for about 30 minutes before adding them to your pot.
How long should I simmer the broth?
For the best results, simmer your broth for 12 to 24 hours. The longer it cooks, the more collagen and nutrients will be extracted from the bones, giving you a gelatin-rich, flavorful broth. If you’re using a slow cooker, set it on low and let it simmer for a full day to get the most out of your bones.
Can I make broth without vegetables?
While you can technically make broth with just bones and water, adding vegetables like onions, carrots, and celery will really enhance the flavor and complexity. For a more neutral broth, you can skip the vegetables, but keep in mind you might miss out on some depth of flavor.
How do I store soup bone broth?
Once your broth is done, let it cool to room temperature. Then, pour it into an airtight container and store it in the fridge for up to 1 week. If you want to keep it for longer, freeze it in ice cube trays or large containers. It will last in the freezer for up to 3 months.